Windows版UPDF
 Mac版UPDF
 iPhone/iPad版UPDF
 Android版UPDF
 UPDF AI オンライン
 UPDF Sign
 PDF編集
PDF編集 PDF注釈付け
 PDF作成
PDF作成 PDFフォーム
 リンクの編集
 PDF変換
PDF変換 OCR機能
OCR機能 PDFからWordへ
 PDFから画像へ
 PDFからExcelへ
 PDFのページ整理
 PDF結合
PDF結合 PDF分割
PDF分割 ページのトリミング
 ページの回転
 PDF保護
PDF保護 PDF署名
PDF署名 PDFの墨消し
 PDFサニタイズ
 セキュリティ解除
 PDF閲覧
PDF閲覧 UPDF クラウド
 PDF圧縮
PDF圧縮 PDF印刷
PDF印刷 PDFのバッチ処理
 UPDF AIについて
 UPDF AIソリューション
 AIユーザーガイド
 UPDF AIによくある質問
 PDF要約
PDF要約 PDF翻訳
PDF翻訳 PDF付きチャット
 AIでチャット
 画像付きチャット
 PDFからマインドマップへの変換
 PDF説明
PDF説明 学術研究
学術研究 論文検索
論文検索 AI校正ツール
 AIライター
 AI宿題ヘルパー
 AIクイズメーカー
 AI数学ソルバー
 PDFからWordへ
 PDFからExcelへ
 PDFからPowerPointへ
 ユーザーガイド
 UPDFを使いこなすヒント
 よくあるご質問
 UPDF レビュー
 ダウンロードセンター
 ブログ
ブログ ニュースルーム
 技術仕様
技術仕様 更新情報
更新情報 UPDF vs. Adobe Acrobat
 UPDF vs. Foxit
 UPDF vs. PDF Expert
Batch Combine Files on Windows
If you want to merge multiple PDF documents or images into a single file, UPDF's Batch Combine feature makes it simple and efficient.
Note: UPDF also allows you to split a multi-page PDF into separate files or divide a single PDF page into multiple sections as individual pages. If you need step-by-step guidance for these tasks, click the links below:
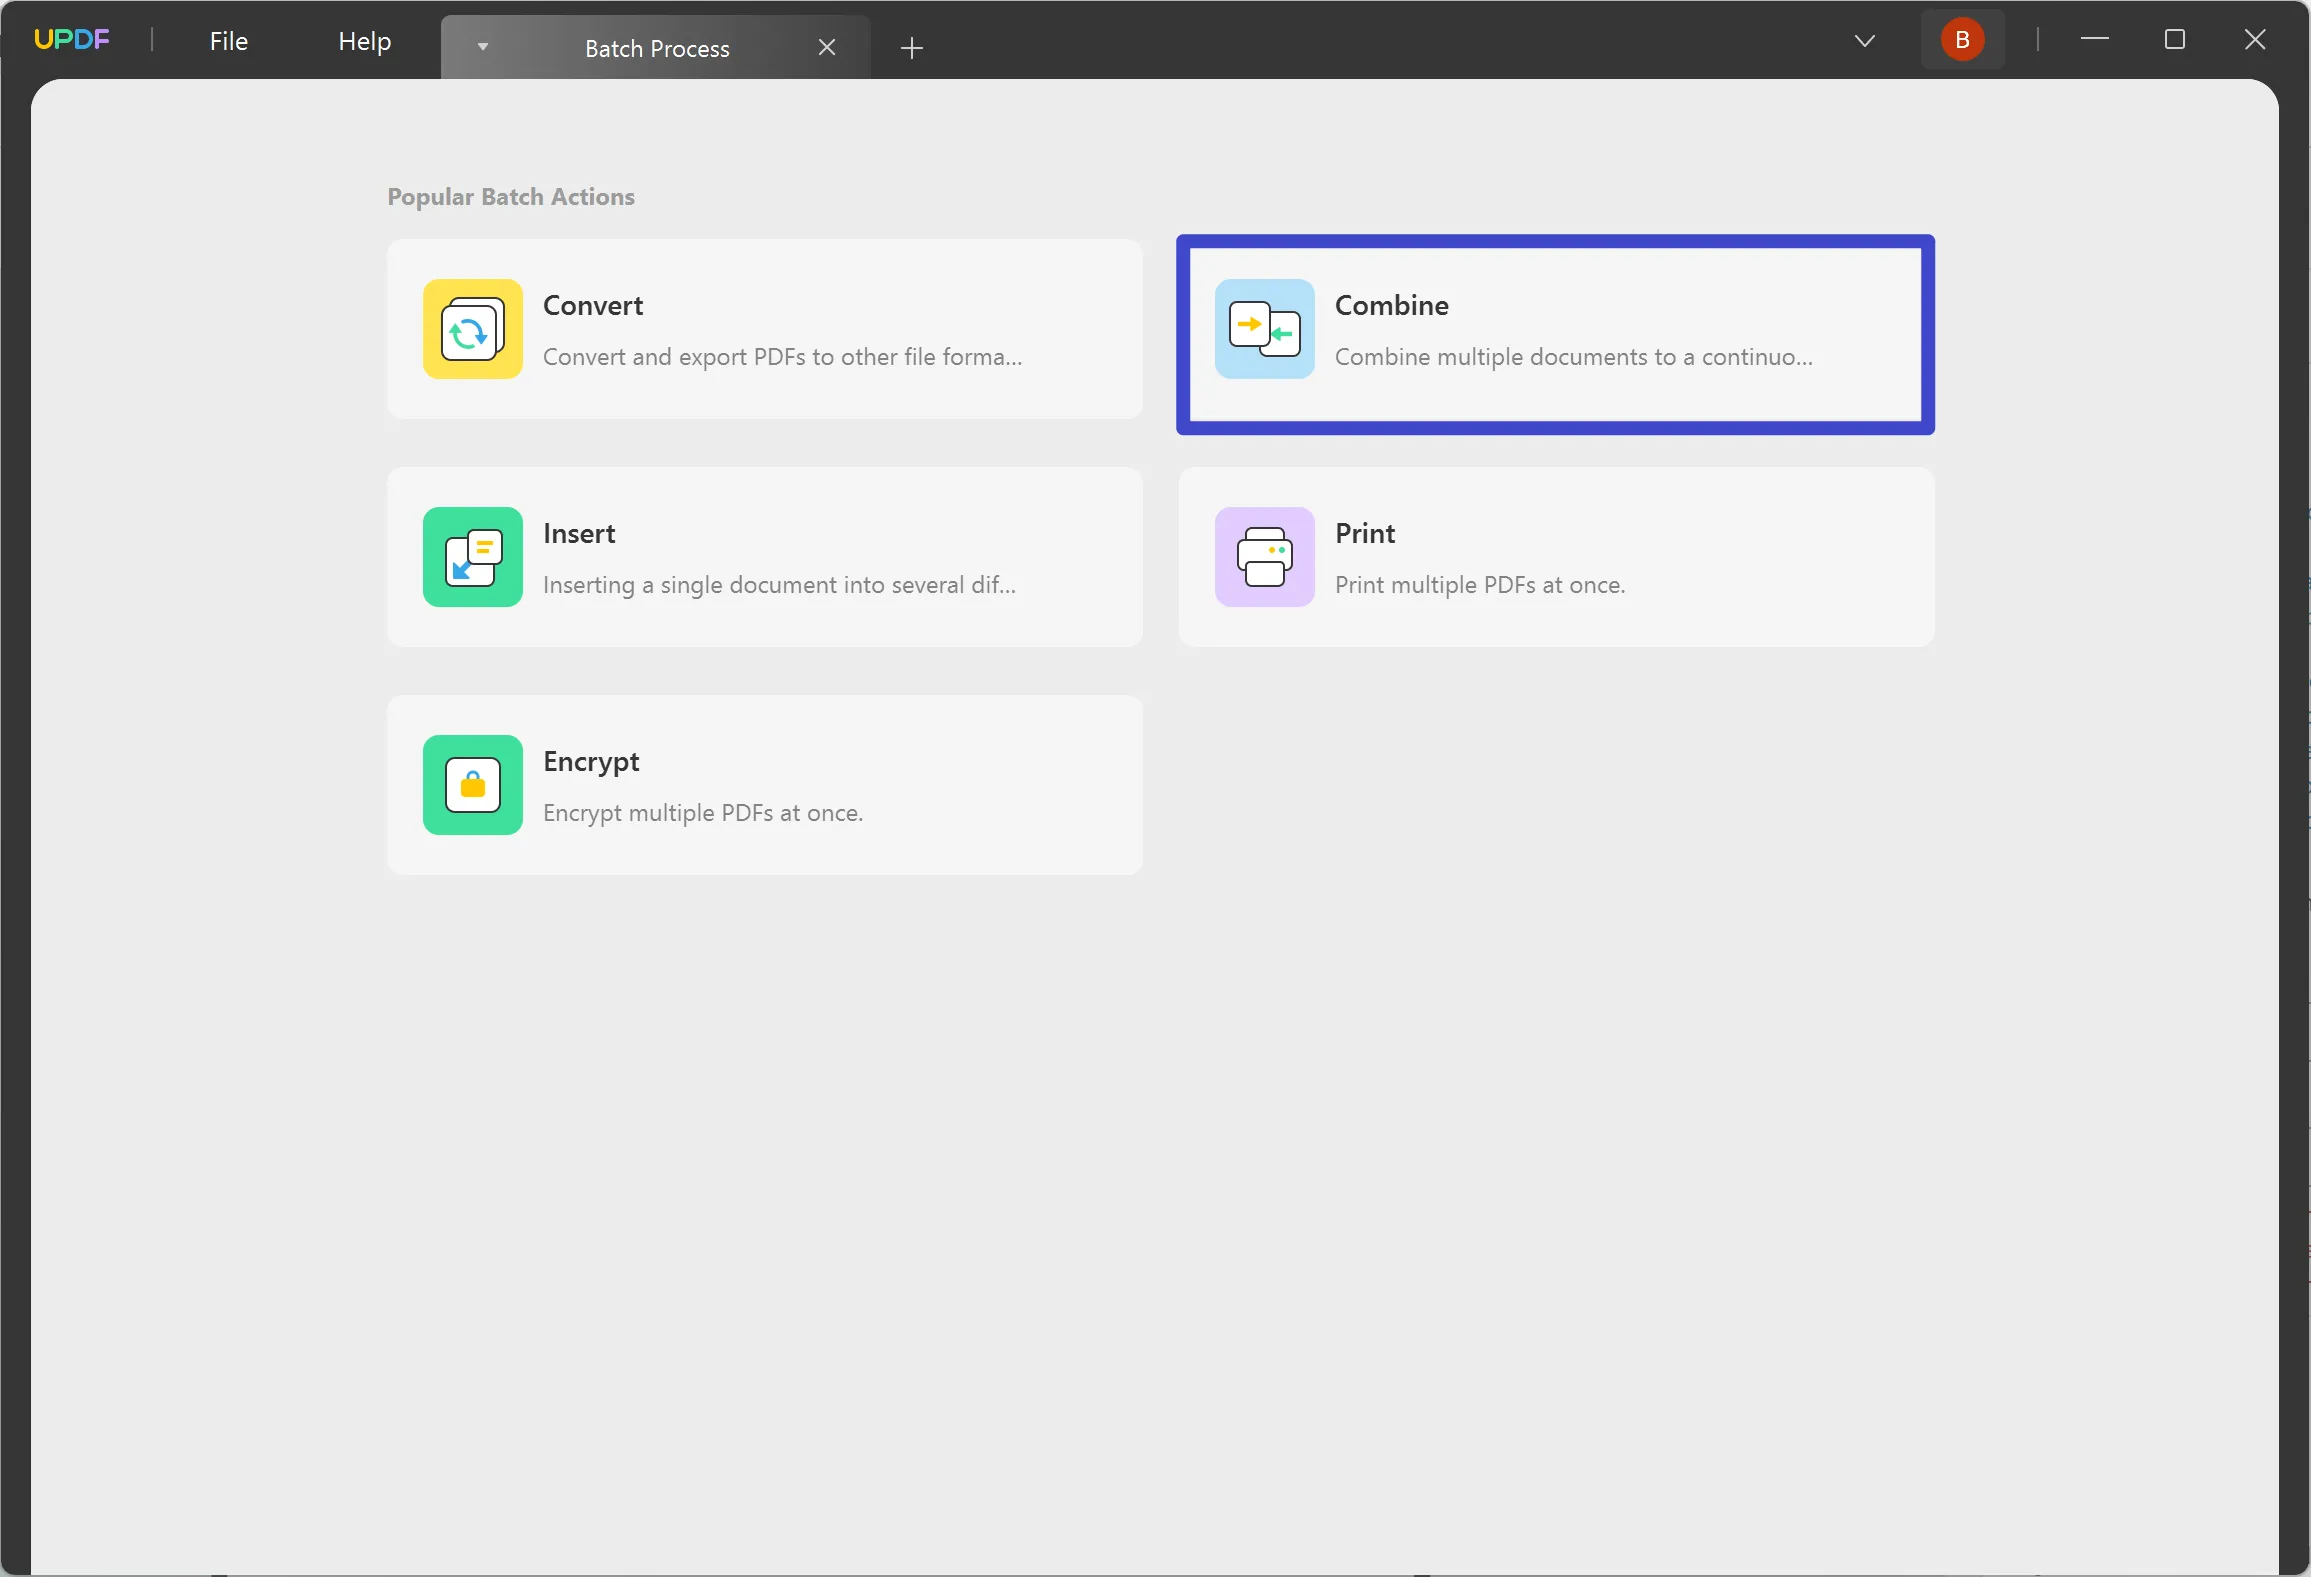
1. Select the Batch Combine Option
As you launch UPDF on your Windows computer, continue to the "Batch PDFs" feature on the home screen to lead to a new window.

In the new window, select the "Combine" option.
This feature provides the ability to combine PDF documents along with a variety of image formats such as JPG, JPEG, PNG, TIFF, BMP, and GIF into a single PDF.
2. Add Files
On leading to a new window, you will have to add files to combine, which can be done in a variety of ways:
- Dragging and Dropping
For starters, you can simply drag and drop your potential files into the opened window of UPDF.
- Navigate Files From Folders
As you select the "Add Files" button, you will be led to a drop-down option where you must select the "Add Files…" option. Continue to browse the file from the file explorer and add it into UPDF successfully.
- Adding Pre-Opened Files
You can also find the option of "Add Open Files…" in the drop-down that opens after selecting the "Add Files" button. This will add all files automatically into the section that is currently open on UPDF.
- Add Complete Folders
For adding a collection of PDF documents, you can add a complete folder with the help of the "Add Folders…" option in the drop-down menu.

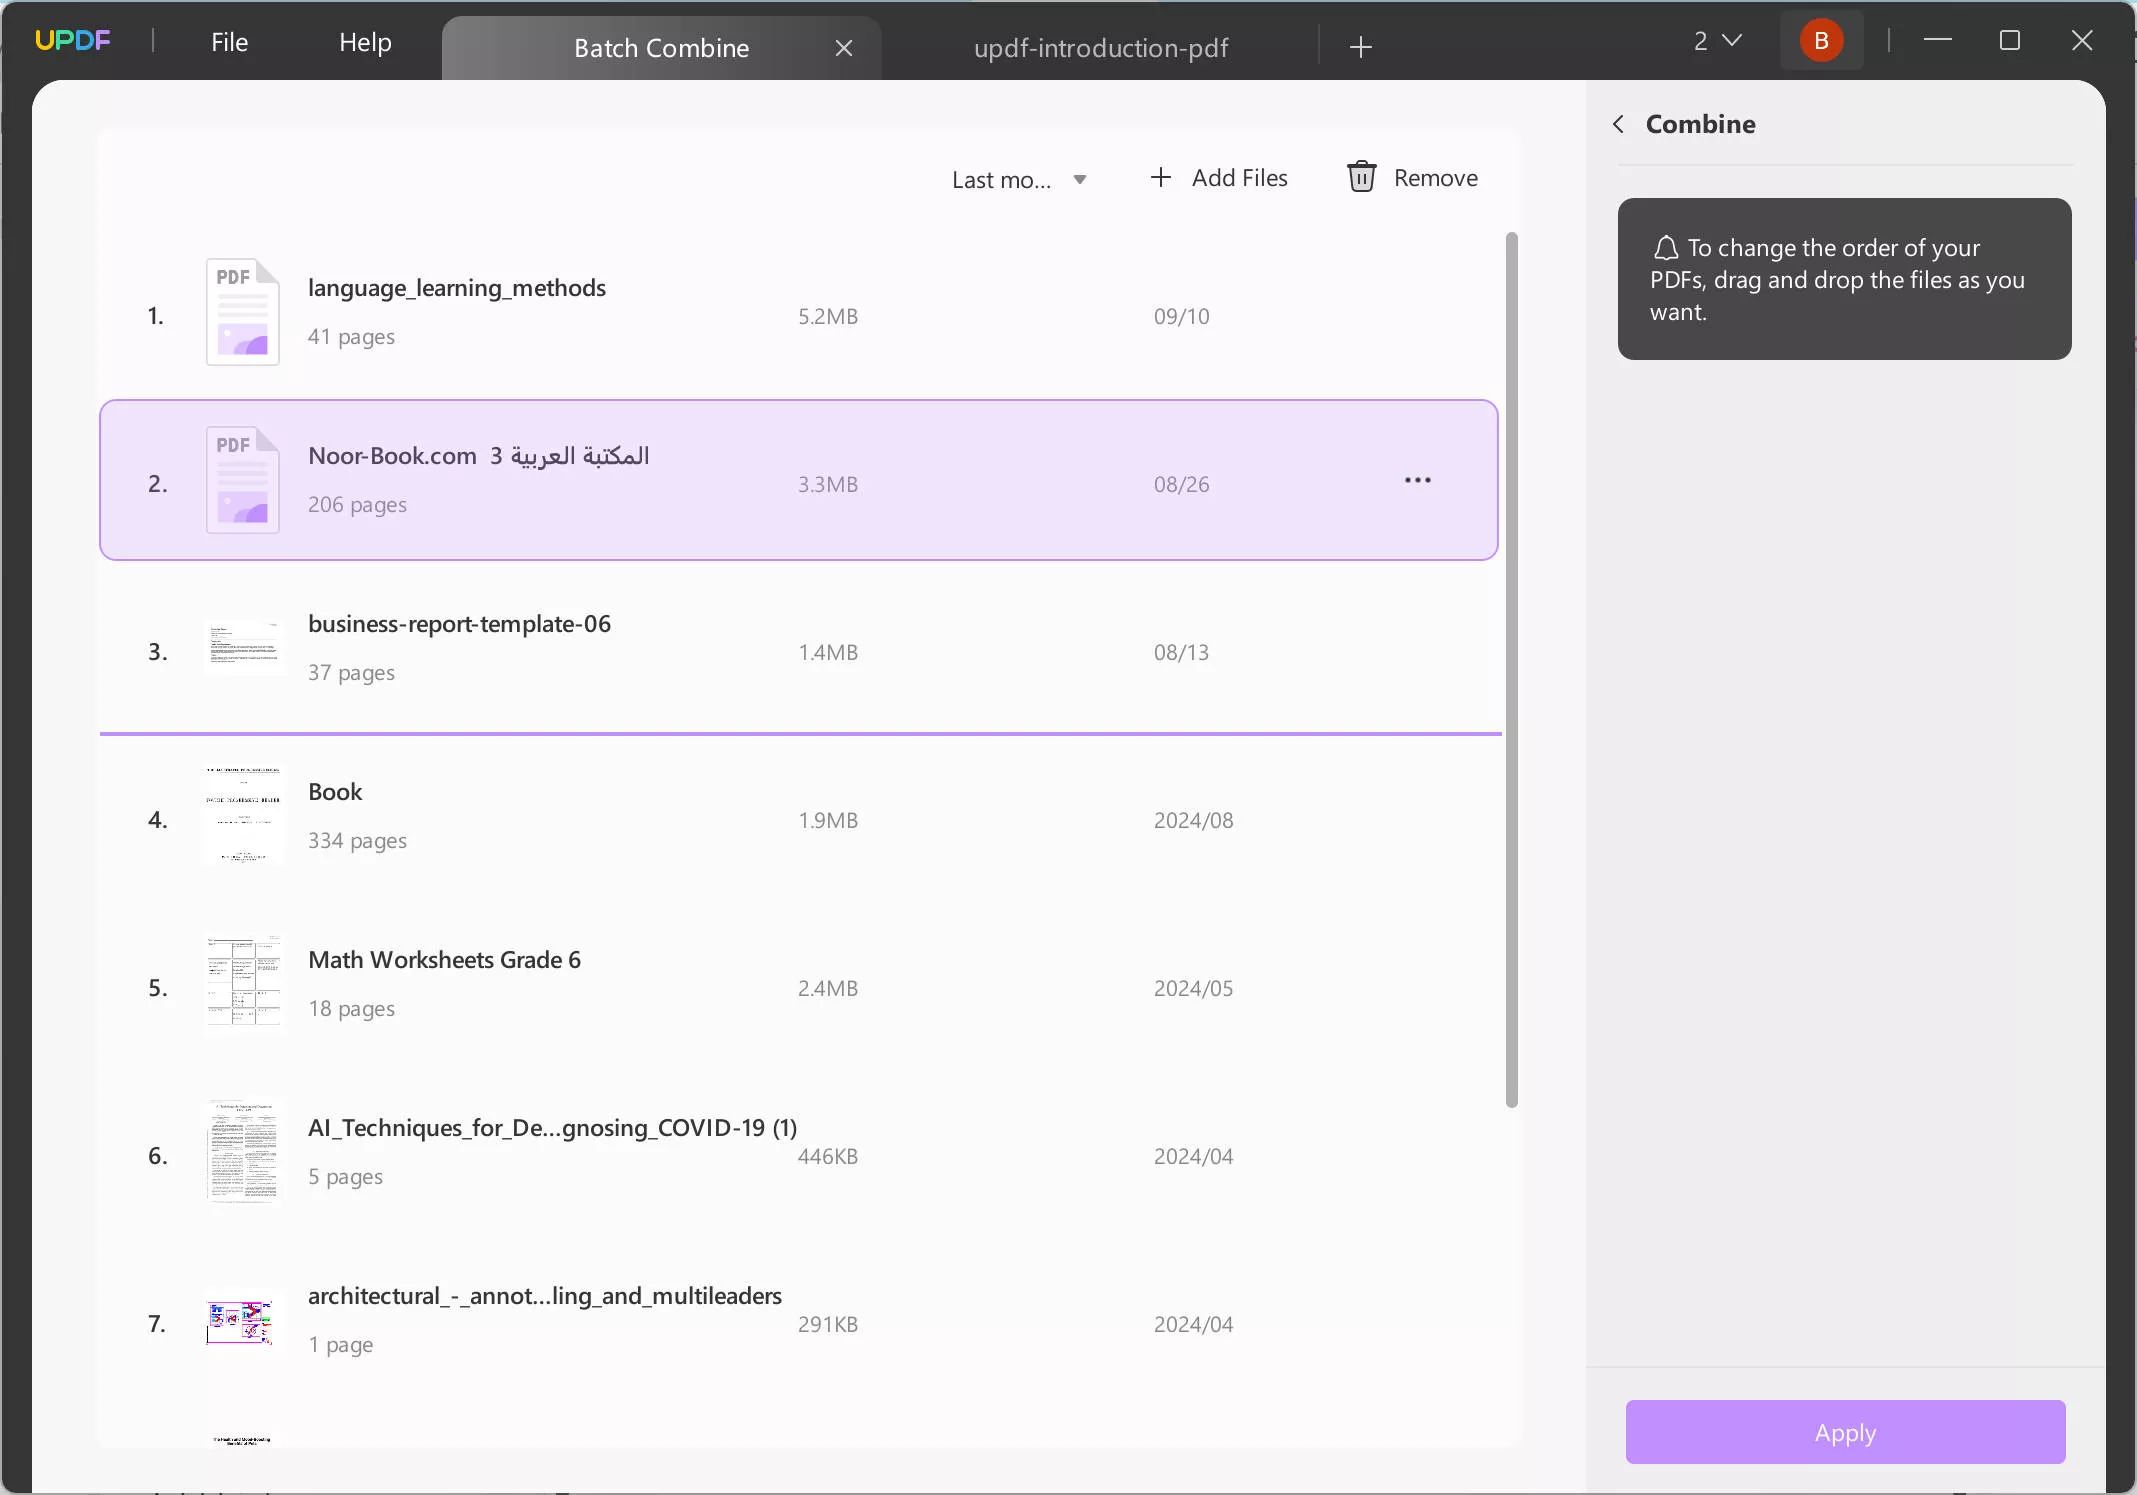
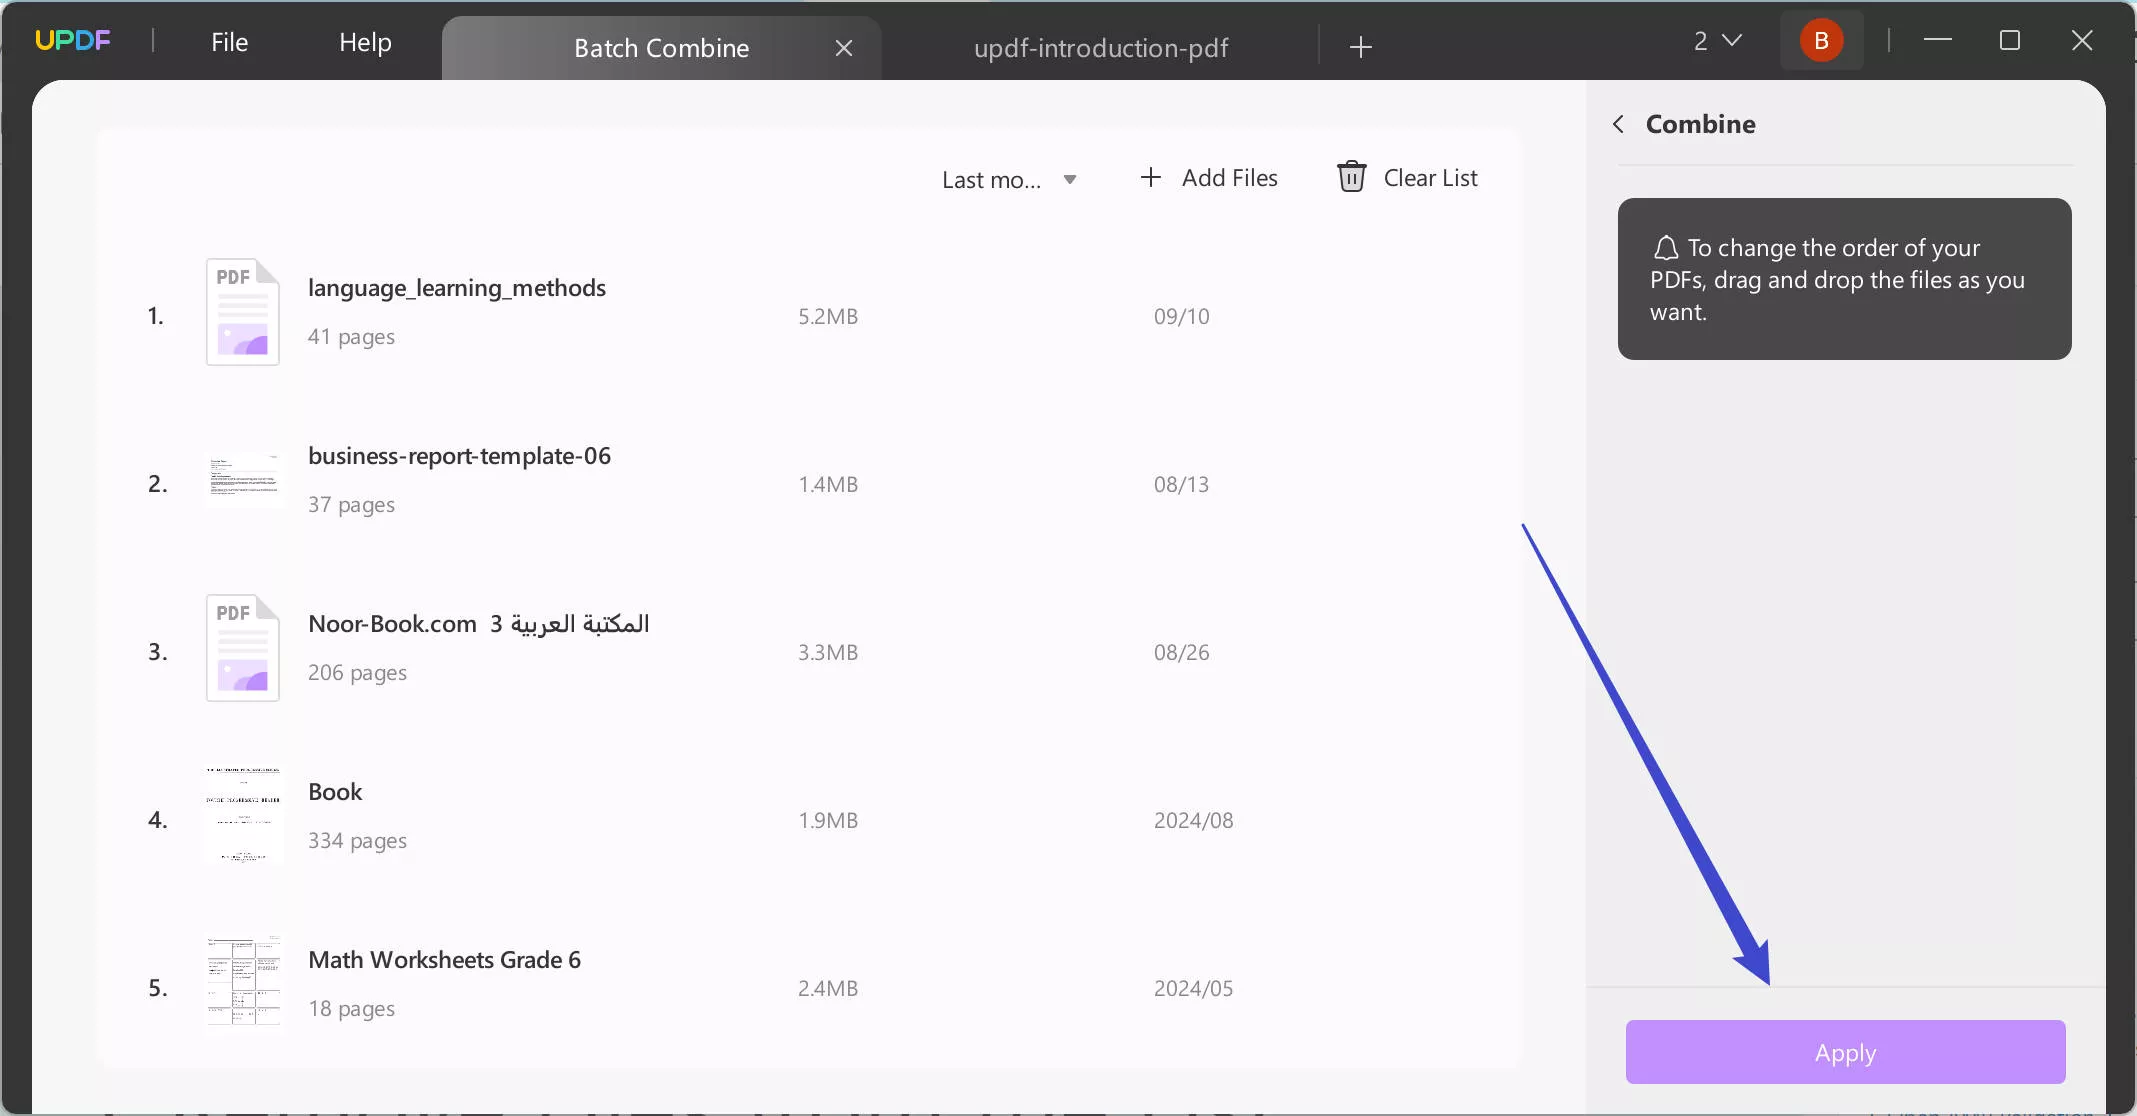
3. Rearranging Added Documents
After adding documents to the Batch Combine panel, you can easily rearrange them by dragging them into the desired order.
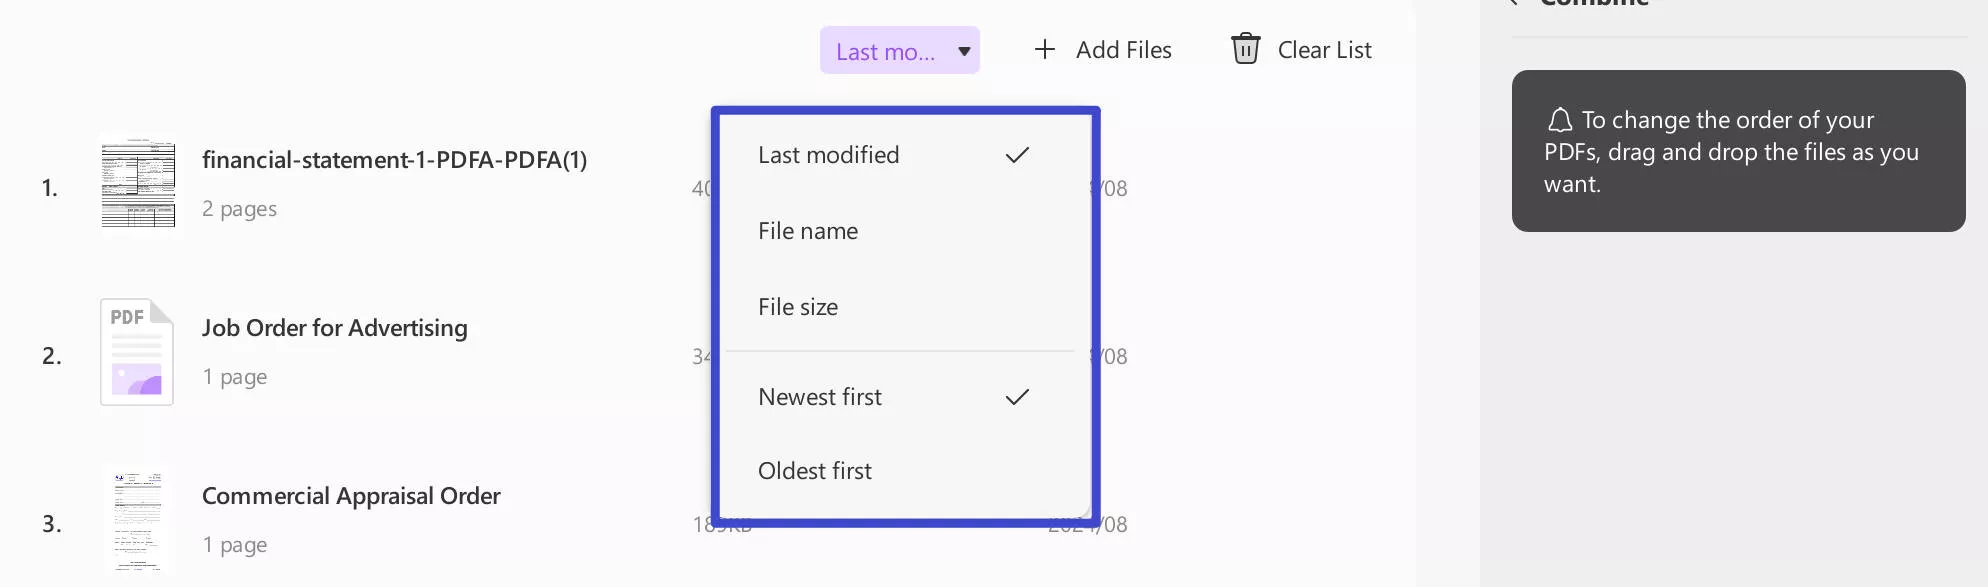
Additionally, UPDF allows you to sort the added files by last modified time, file name, file size, newest first, or oldest first.
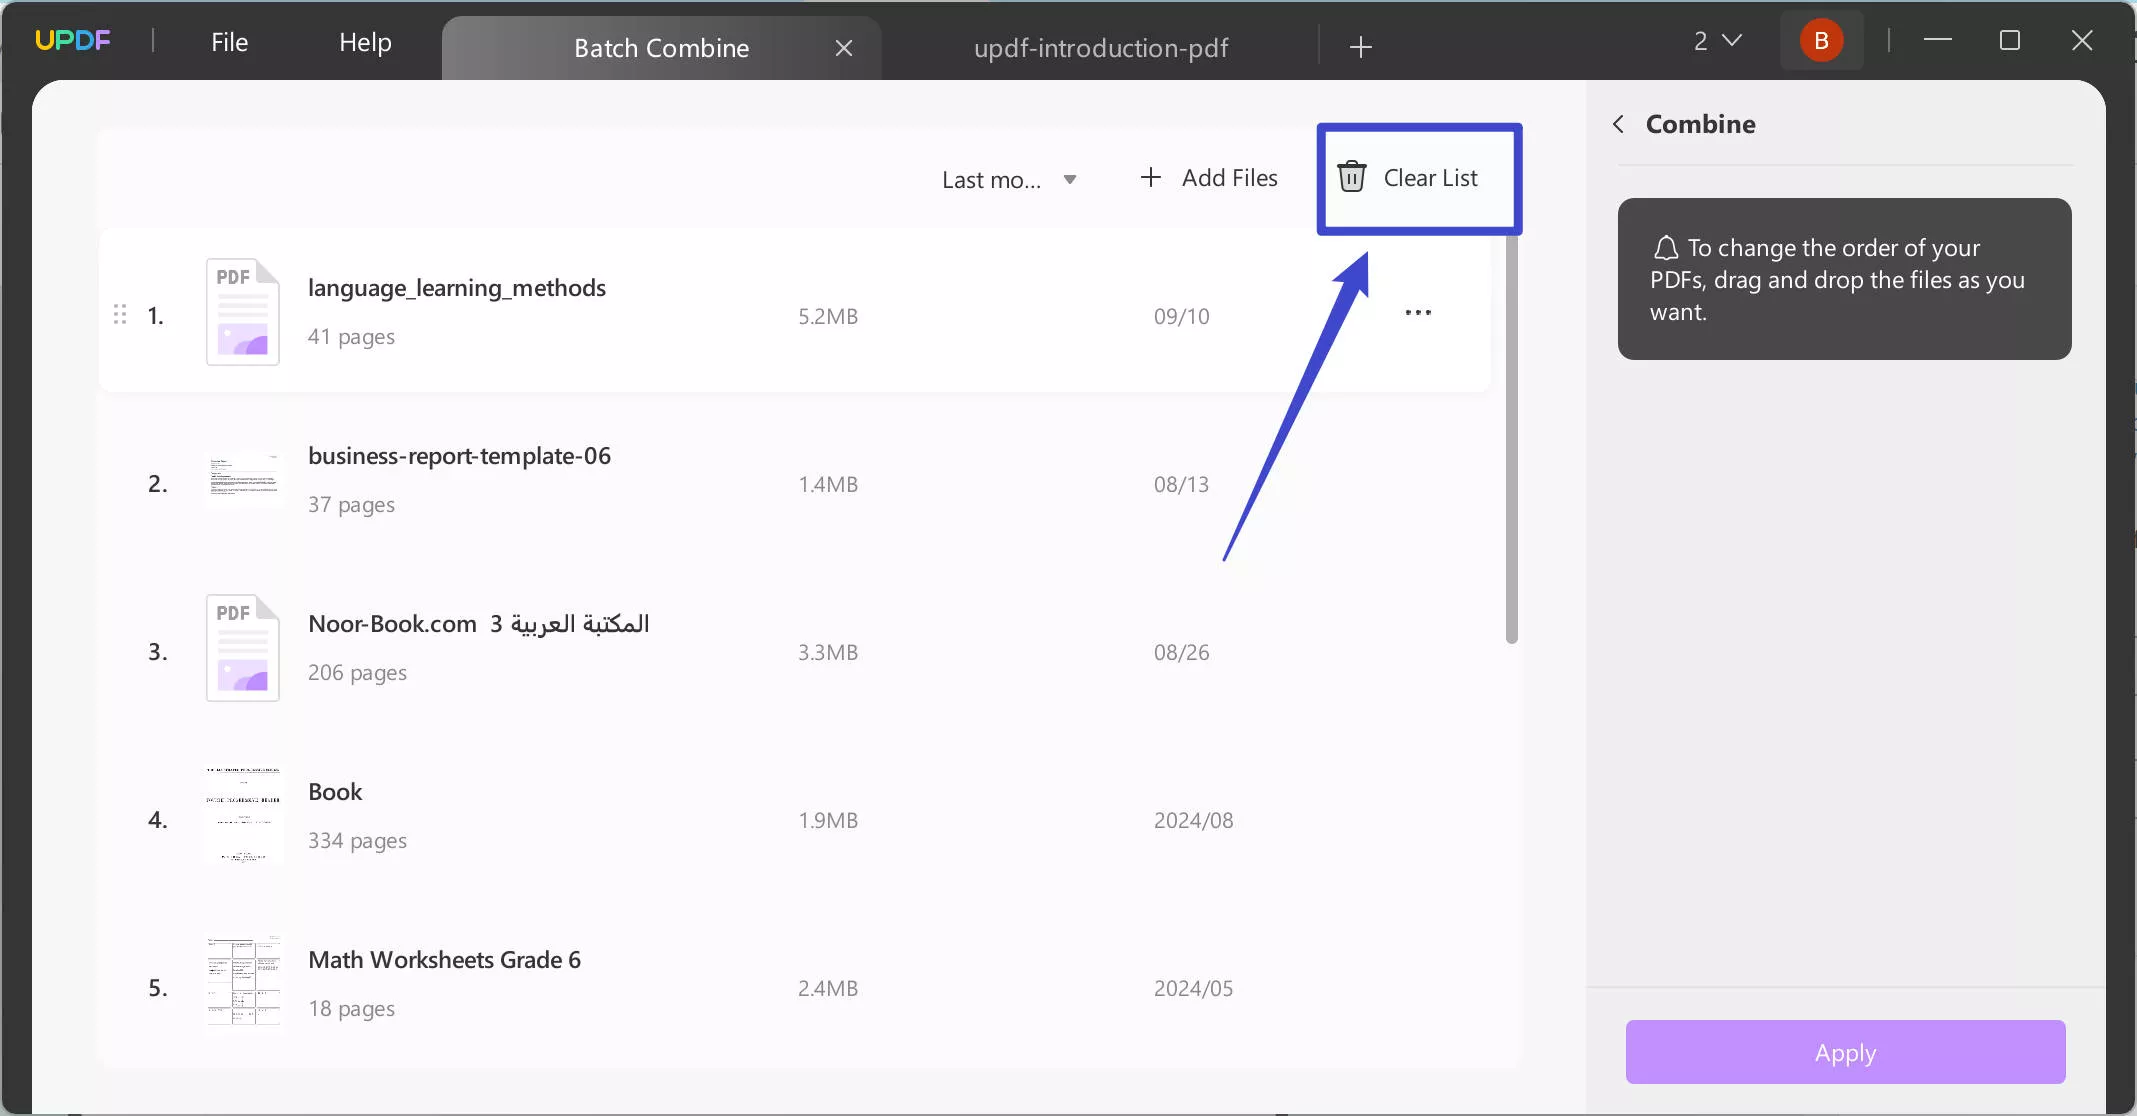
4. Combine Files
As you are done with adding all the files and rearranging them, continue to the "Apply" button to save the new document in any particular position you want to.
5. Remove Files from the List
If you intend to remove a specific file, find the "three-dots" icon adjacent to the added document and select the option of "Remove File."
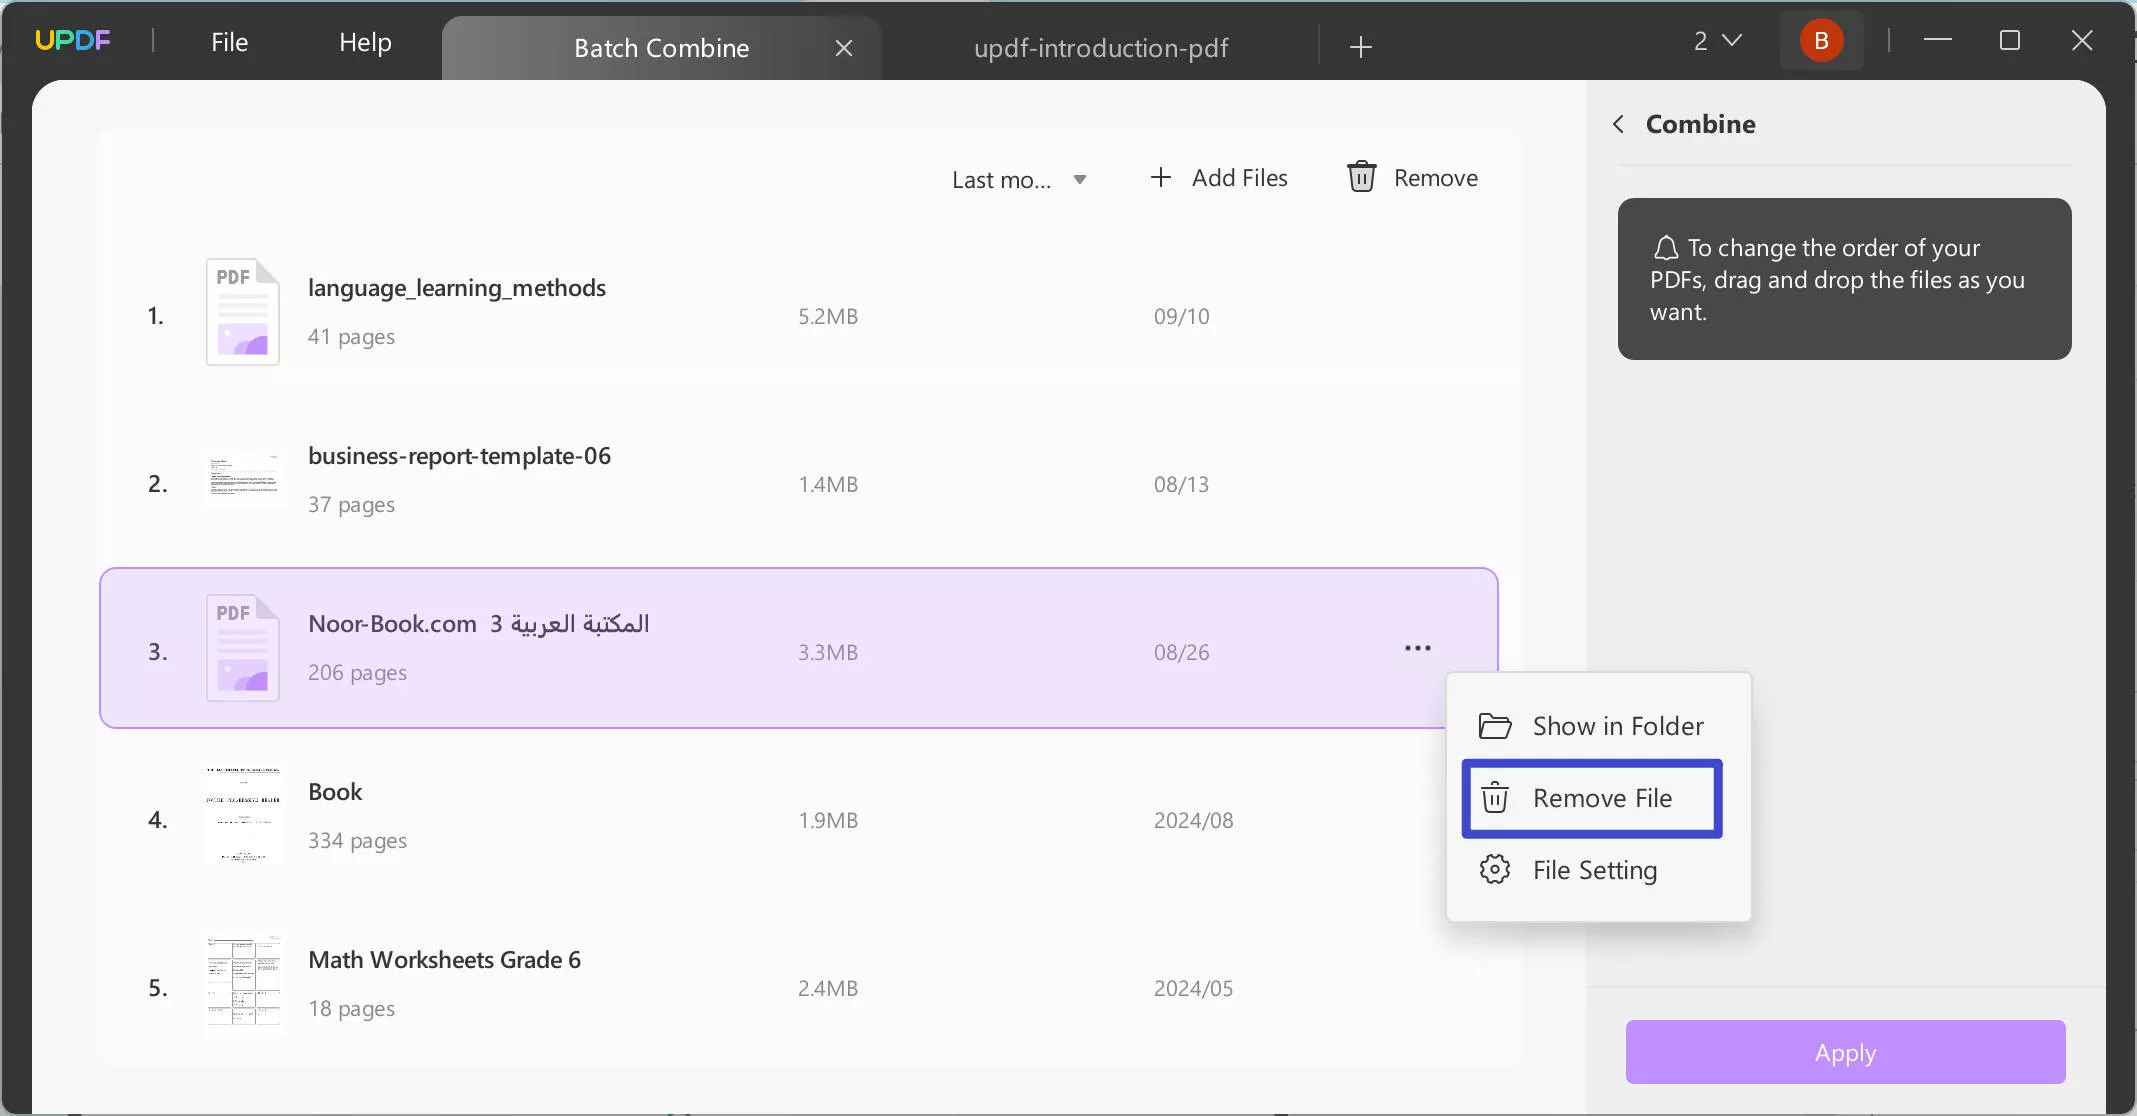
Under the same drop-down, you can also select the option of "Show in Folder" to access the location of the document. To view its properties, use the option of "File Setting."
If you intend to clear the complete list of added documents, use the "Clear List" button.