 UPDF for Windows
 UPDF for Mac
 UPDF for iPhone/iPad
 UPDF for Android
 UPDF AI Online
 UPDF Sign
 Edit PDF
 Annotate PDF
 Create PDF
 PDF Form
 Edit links
 Convert PDF
 OCR
OCR PDF to Word
 PDF to Image
 PDF to Excel
 Organize PDF
 Merge PDF
 Split PDF
 Crop PDF
 Rotate PDF
 Protect PDF
 Sign PDF
 Redact PDF
 Sanitize PDF
 Remove Security
 Read PDF
 UPDF Cloud
 Compress PDF
 Print PDF
 Batch Process
 About UPDF AI
 UPDF AI Solutions
 AI User Guide
 FAQ about UPDF AI
 Summarize PDF
 Translate PDF
 Chat with PDF
 Chat with AI
 Chat with image
 PDF to Mind Map
 Explain PDF
 Deep Research
 Paper Search
 AI Proofreader
 AI Writer
 AI Homework Helper
 AI Quiz Generator
 AI Math Solver
 PDF to Word
 PDF to Excel
 PDF to PowerPoint
 User Guide
 UPDF Tricks
 FAQs
FAQs UPDF Reviews
 Download Center
 Blog
Blog Newsroom
 Tech Spec
 Updates
 UPDF vs. Adobe Acrobat
 UPDF vs. Foxit
 UPDF vs. PDF Expert
Create a PDF on iOS
UPDF for iOS makes it easy to create PDFs in different ways. You can start with a blank file, scan documents, convert photos or other formats, merge files, or add them from cloud storage and your computer.
Get UPDF 2.0 for iOS now from the App Store or click the button below to start.
Windows • macOS • iOS • Android 100% secure
1. Create a Blank PDF
UPDF for iOS allows you to create a blank or templated PDF with a range of paper styles and other customization options. Here are the steps:
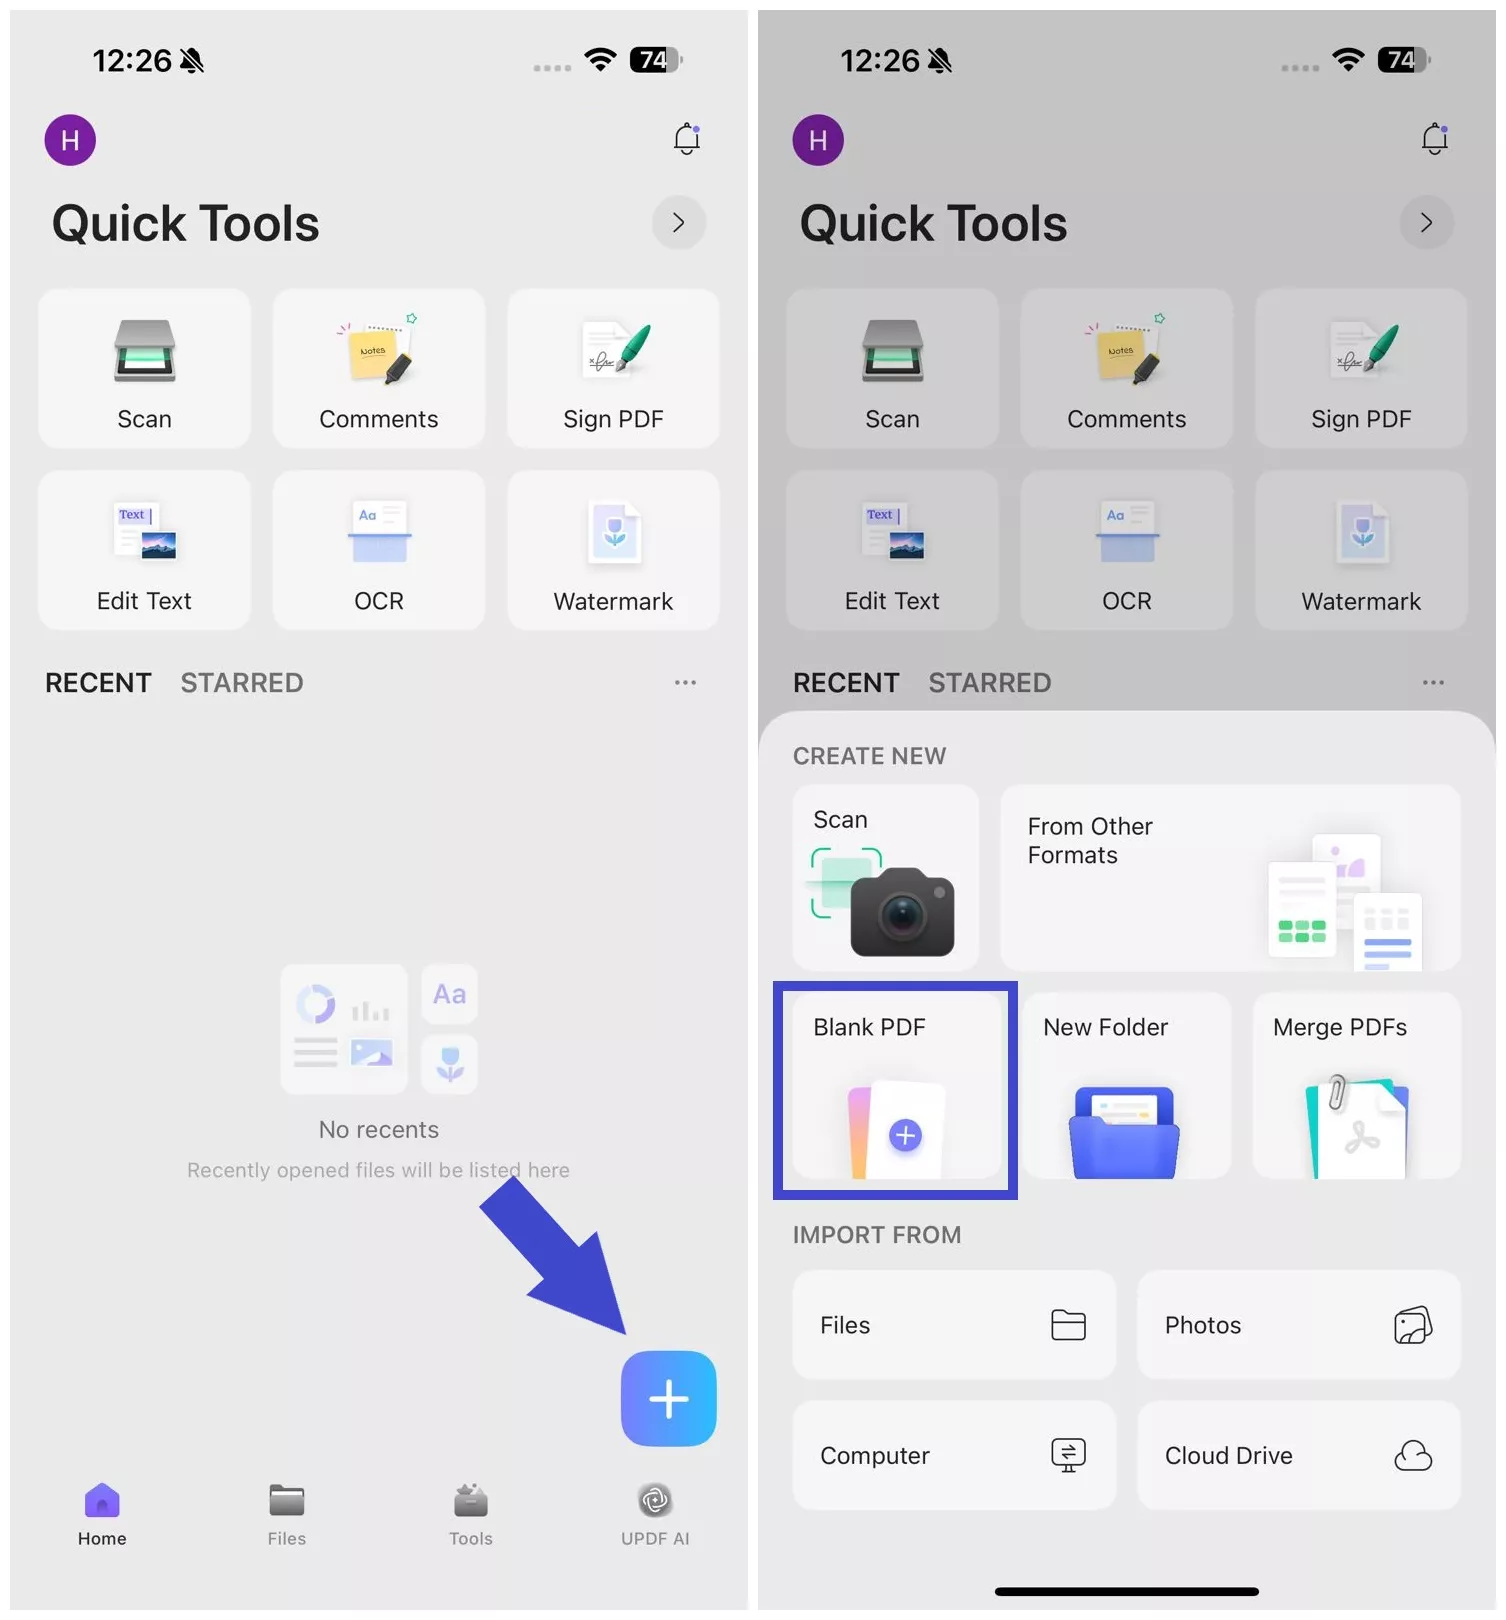
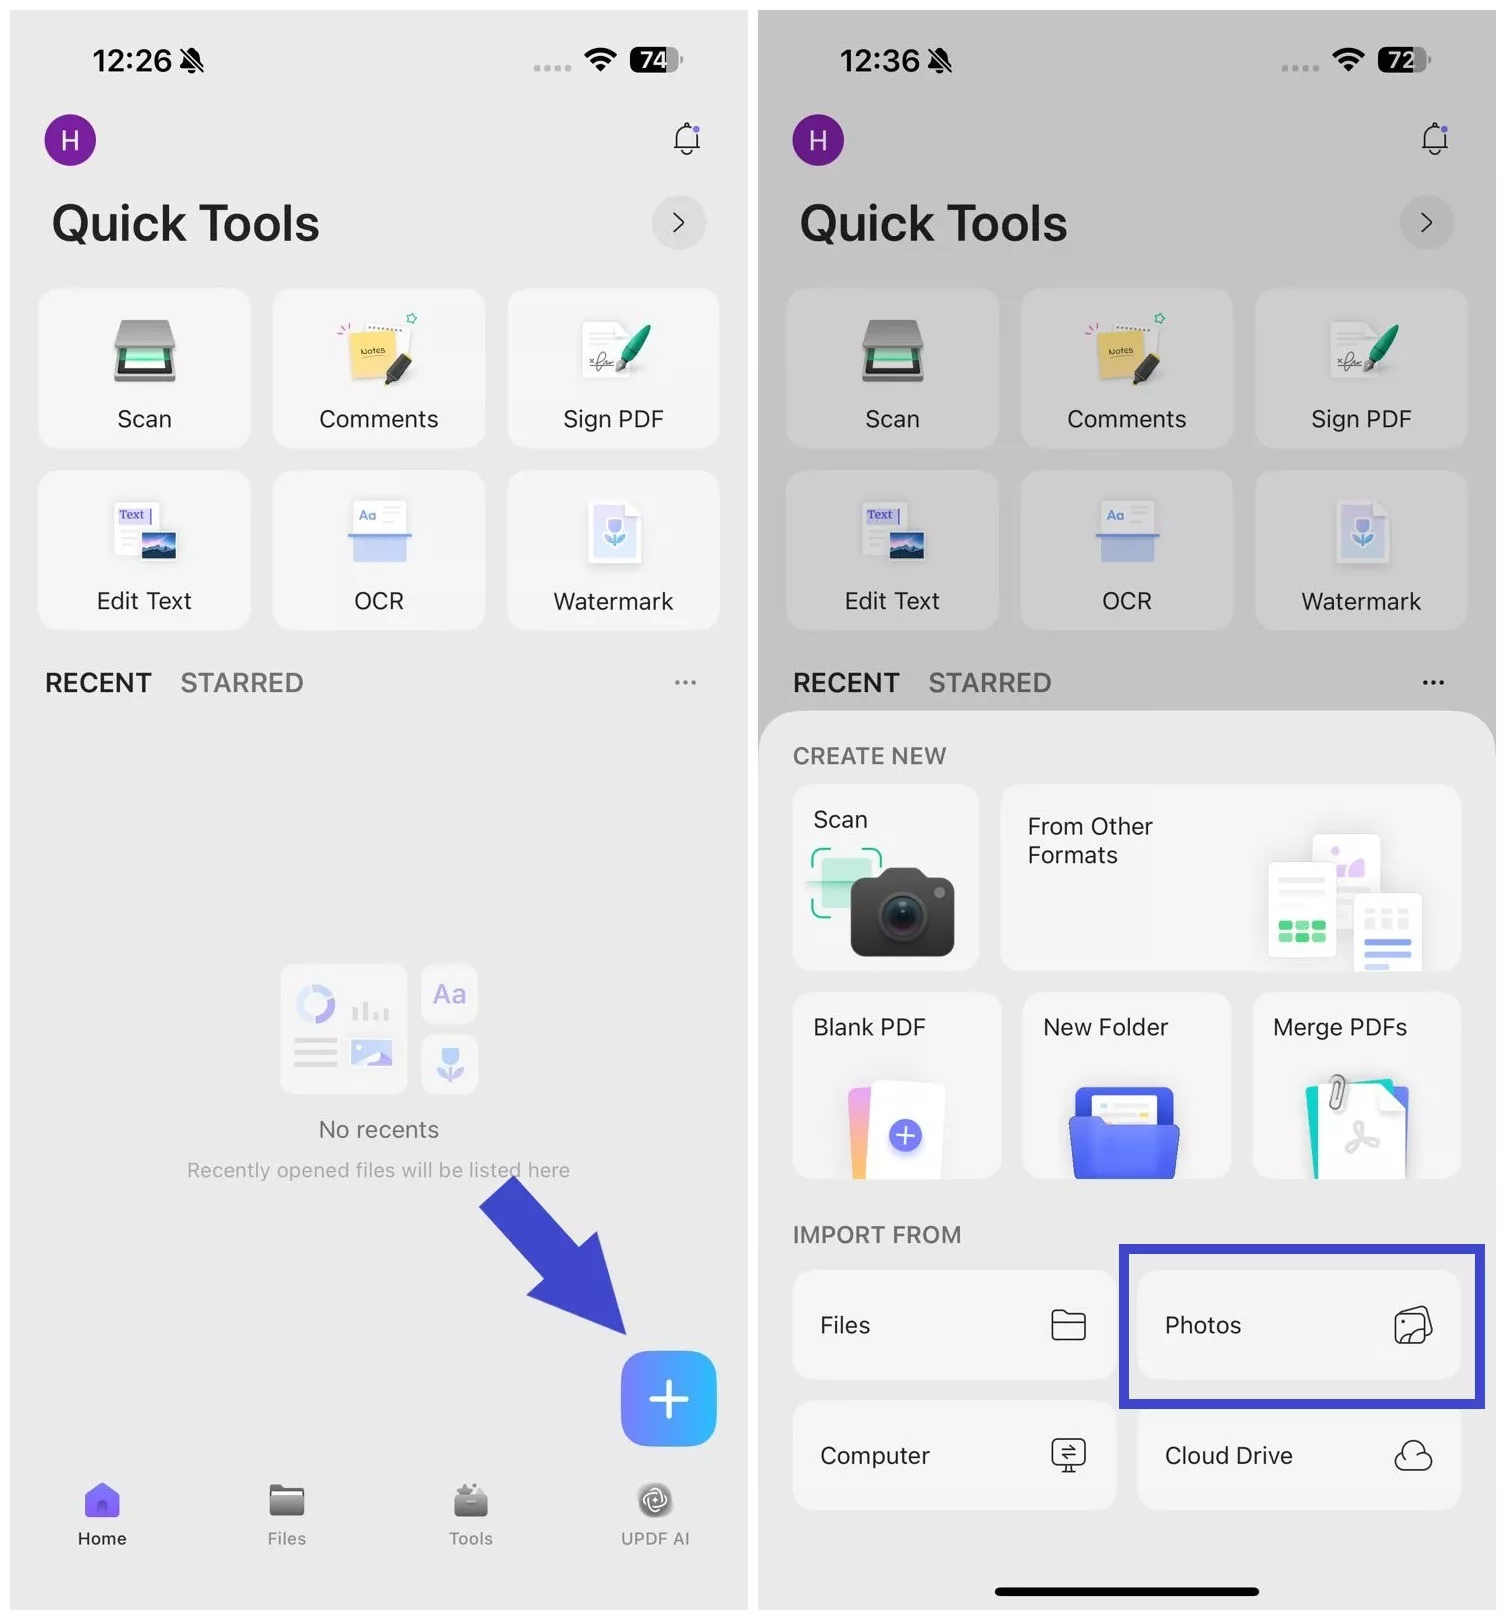
Step 1. Launch UPDF 2.0 on your iPhone. Click the "+" button in the bottom right corner and select "Blank PDF".
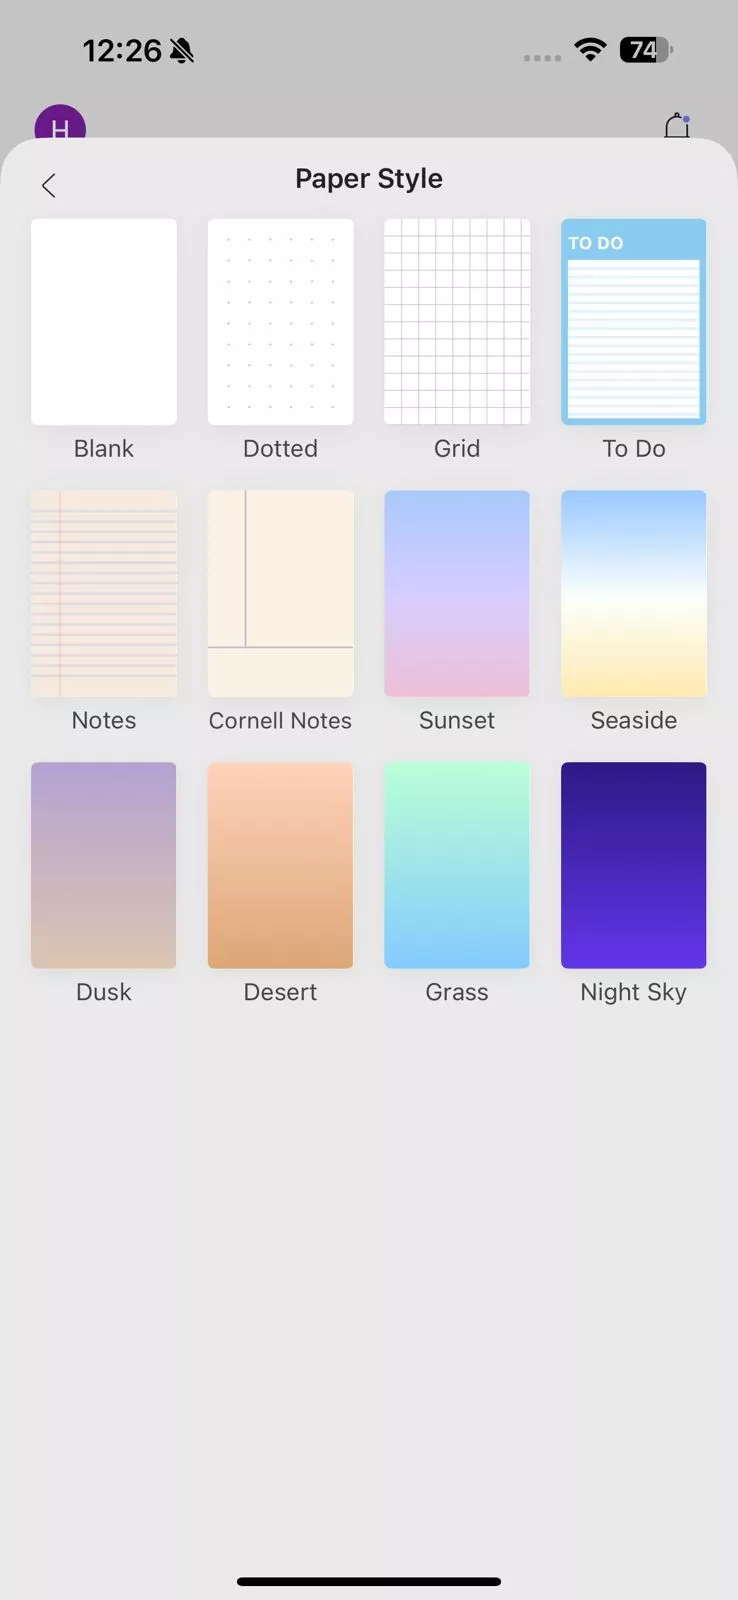
Step 2. Choose one of the Paper Styles:
- Blank
- Dotted
- Grid
- To Do
- Notes
- Cornell Notes
- Sunset
- Seaside
- Dusk
- Desert
- Grass
- Night Sky
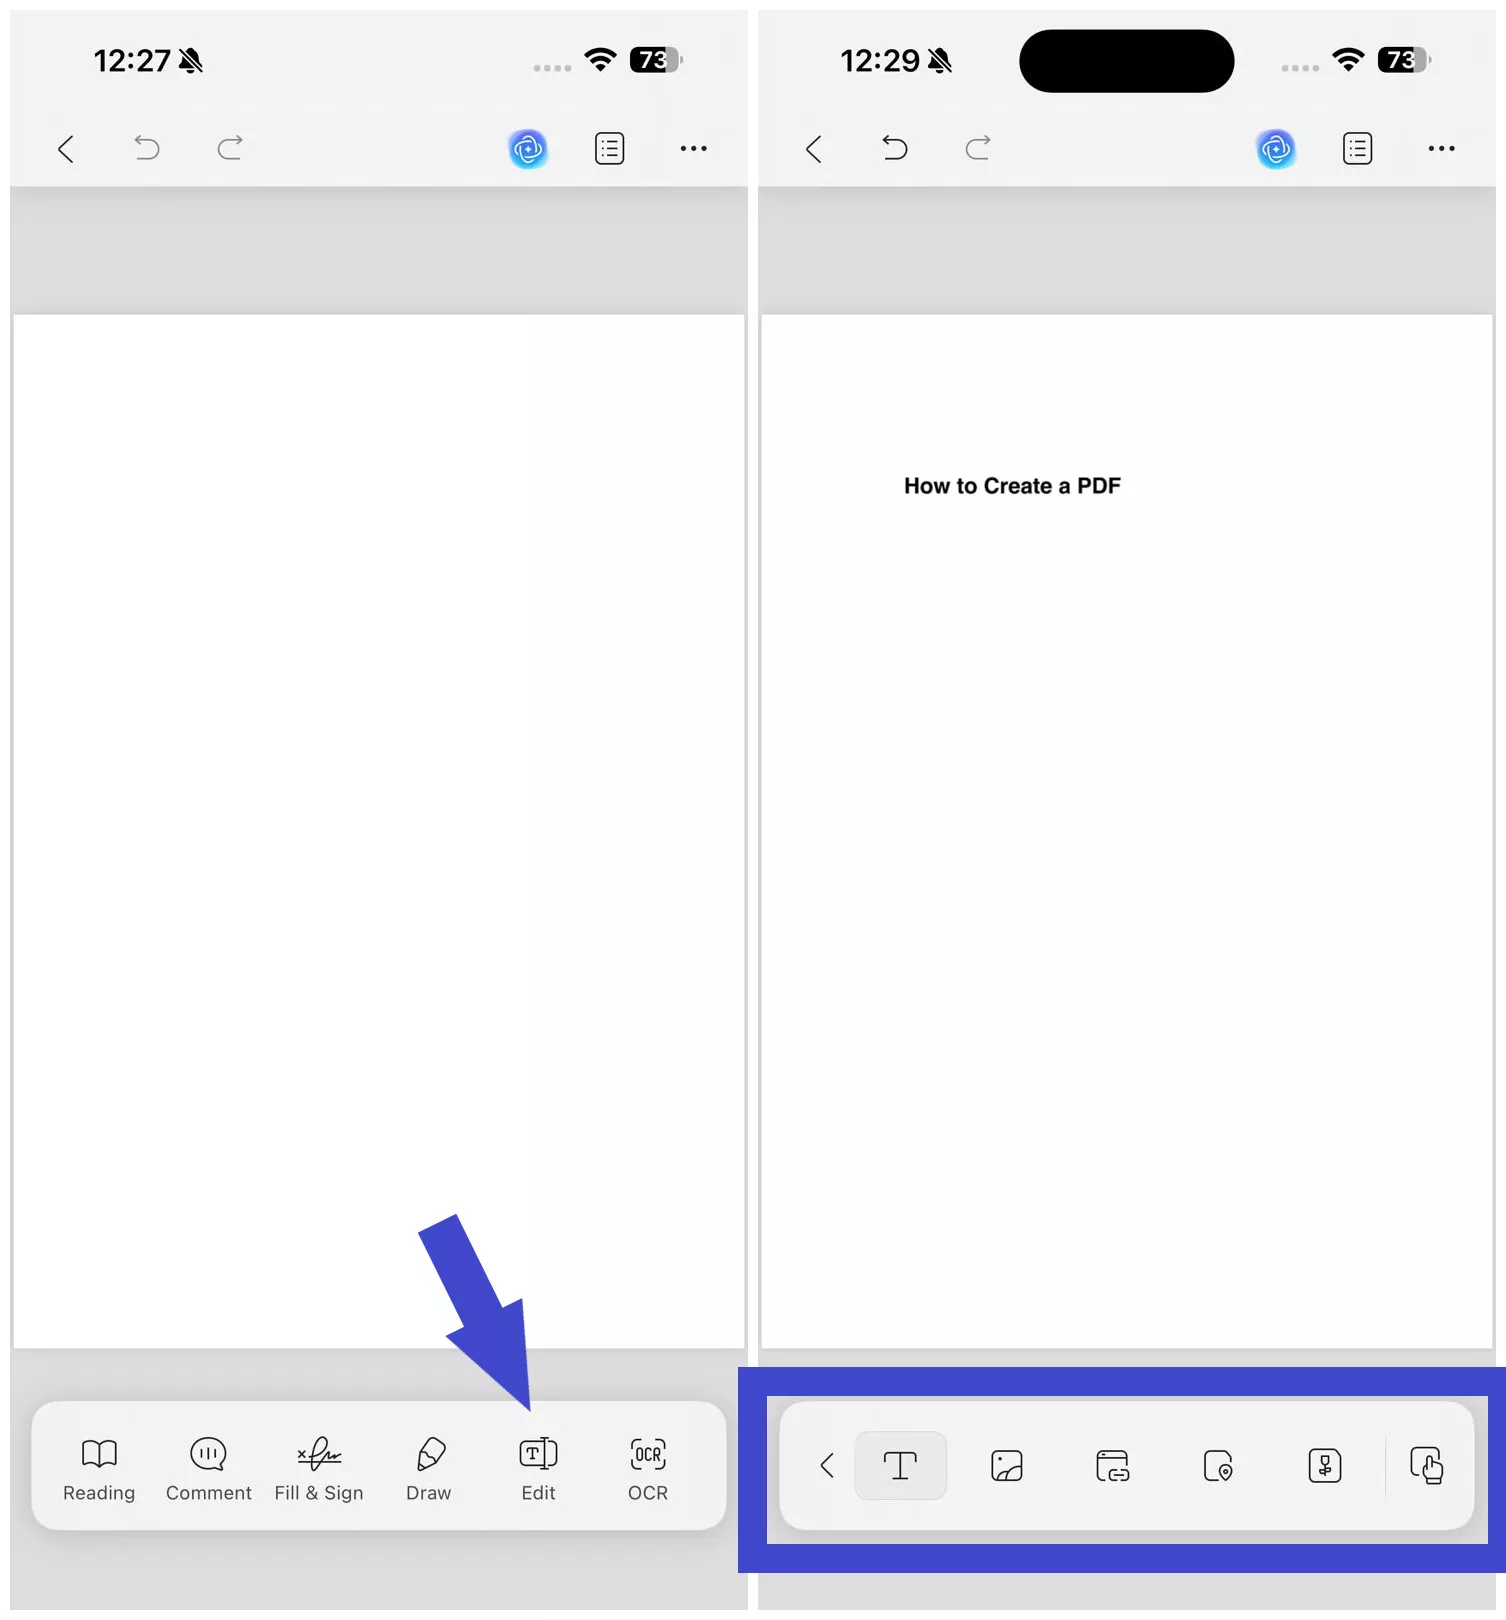
You will get a blank PDF in your preferred paper style, ready for you to add content and graphics.
Step 3. Click the "Edit" option from the bottom toolbar and add the text and image content in the PDF by clicking their icons. You can also add links, watermarks, and more.
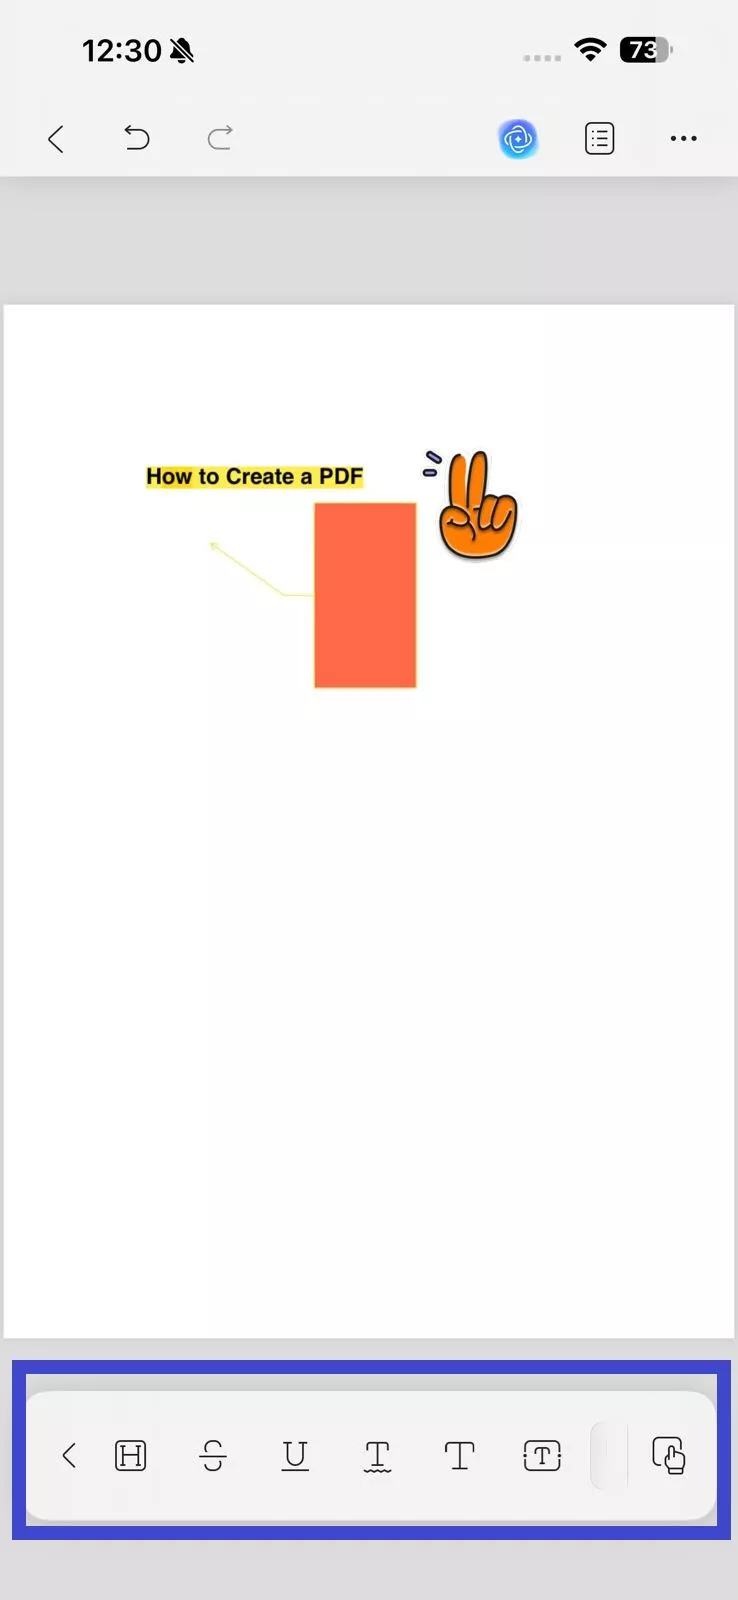
Step 4. Click the "Comment" option to annotate PDF using highlight, underline, sticky notes, stickers, and more.
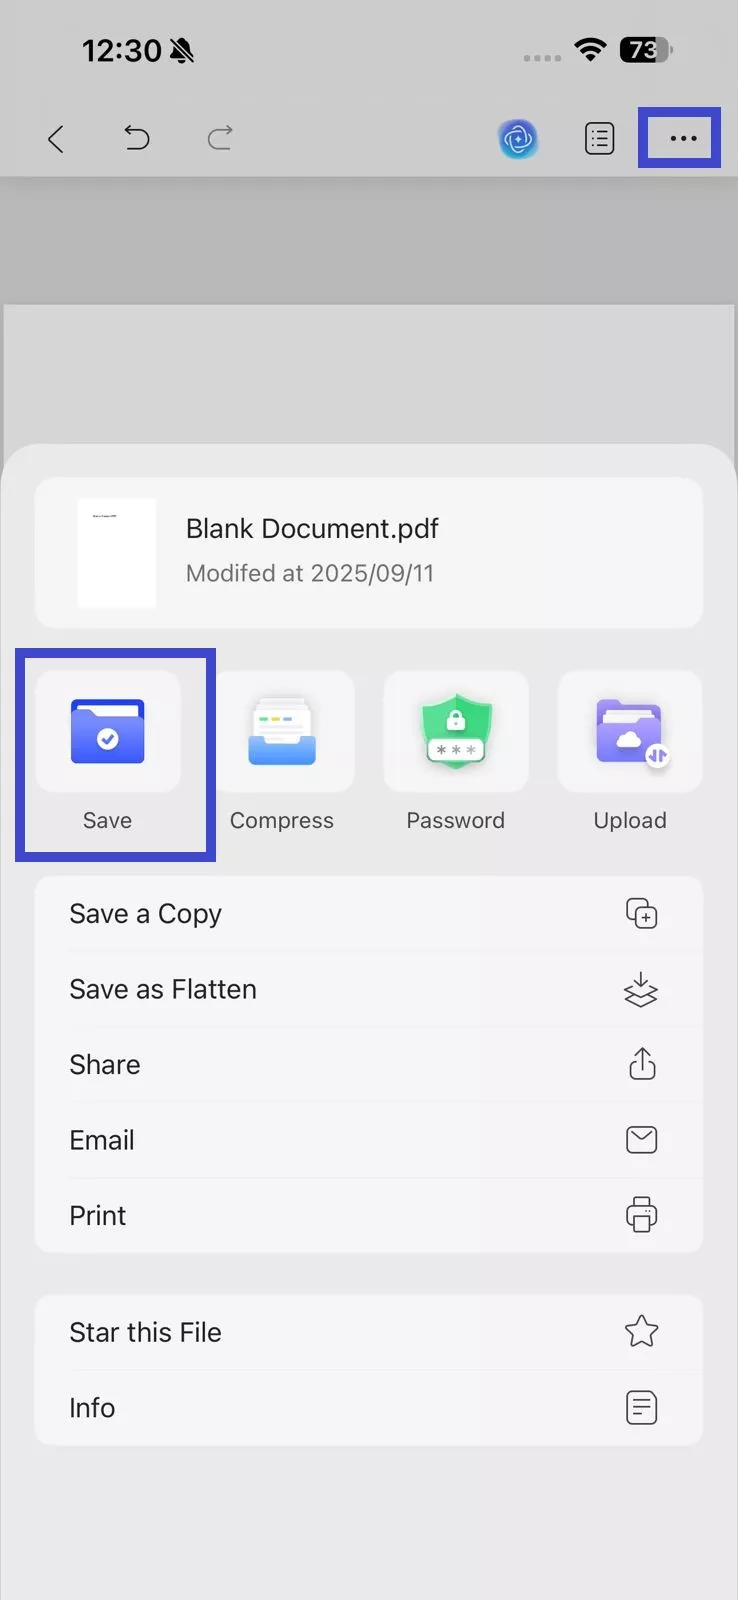
Step 5. Once you have finalized the PDF, click "..." from the top right corner and tap "Save". The newly created PDF will be saved in the UPDF app.
2. Convert Photos to PDF
UPDF offers two ways to convert photos to PDF. However, you first need to import the photo(s) into the UPDF app. Click the "+" icon and select "Photos" under "Import From". Afterward, select the photos you want to import and click "Add".
1. Convert a Single Photo to a PDF
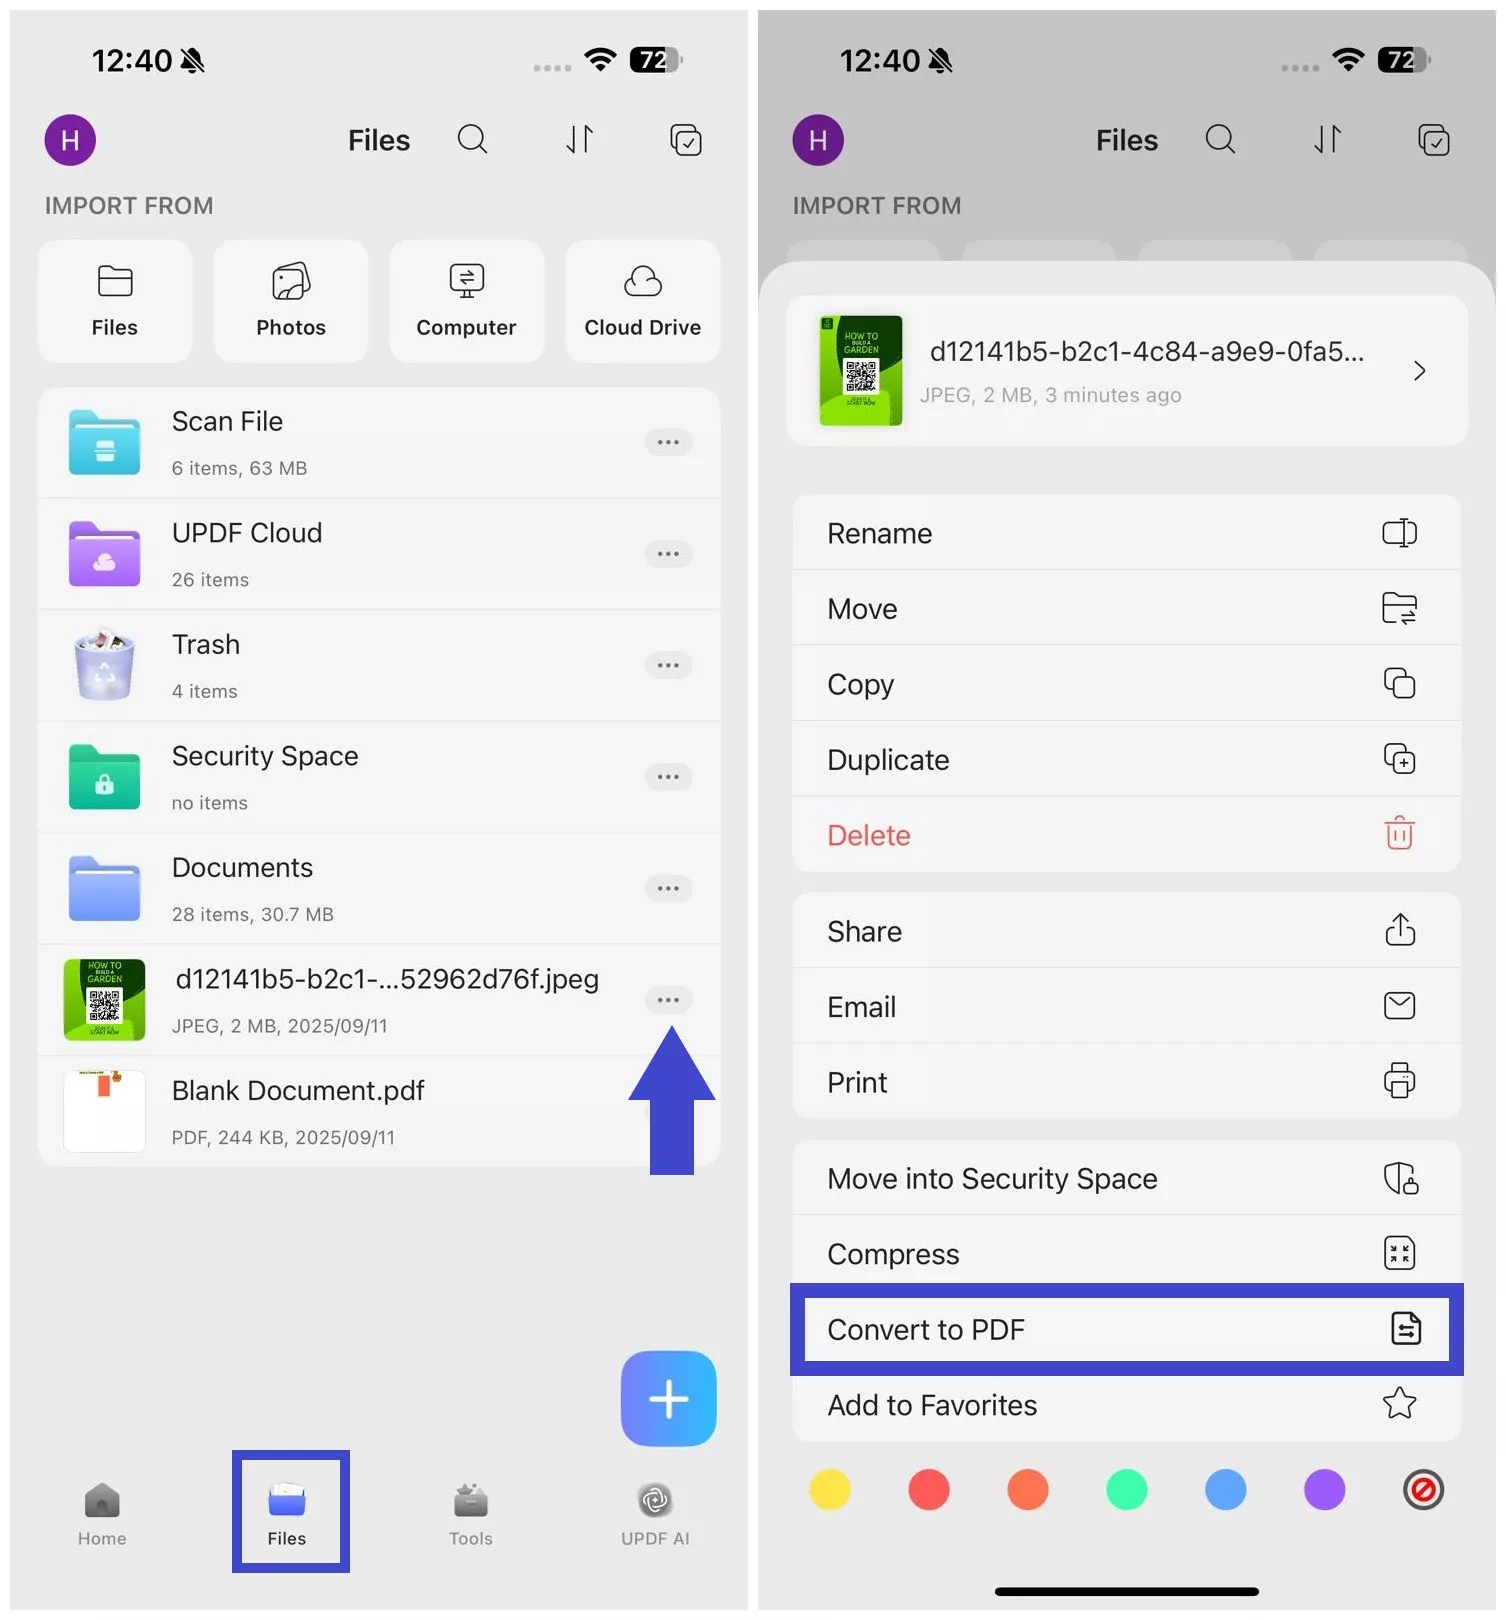
Step 1. Click the "Files" tab and then tap "..." next to the photo you want to convert. Afterward, select "Convert to PDF".
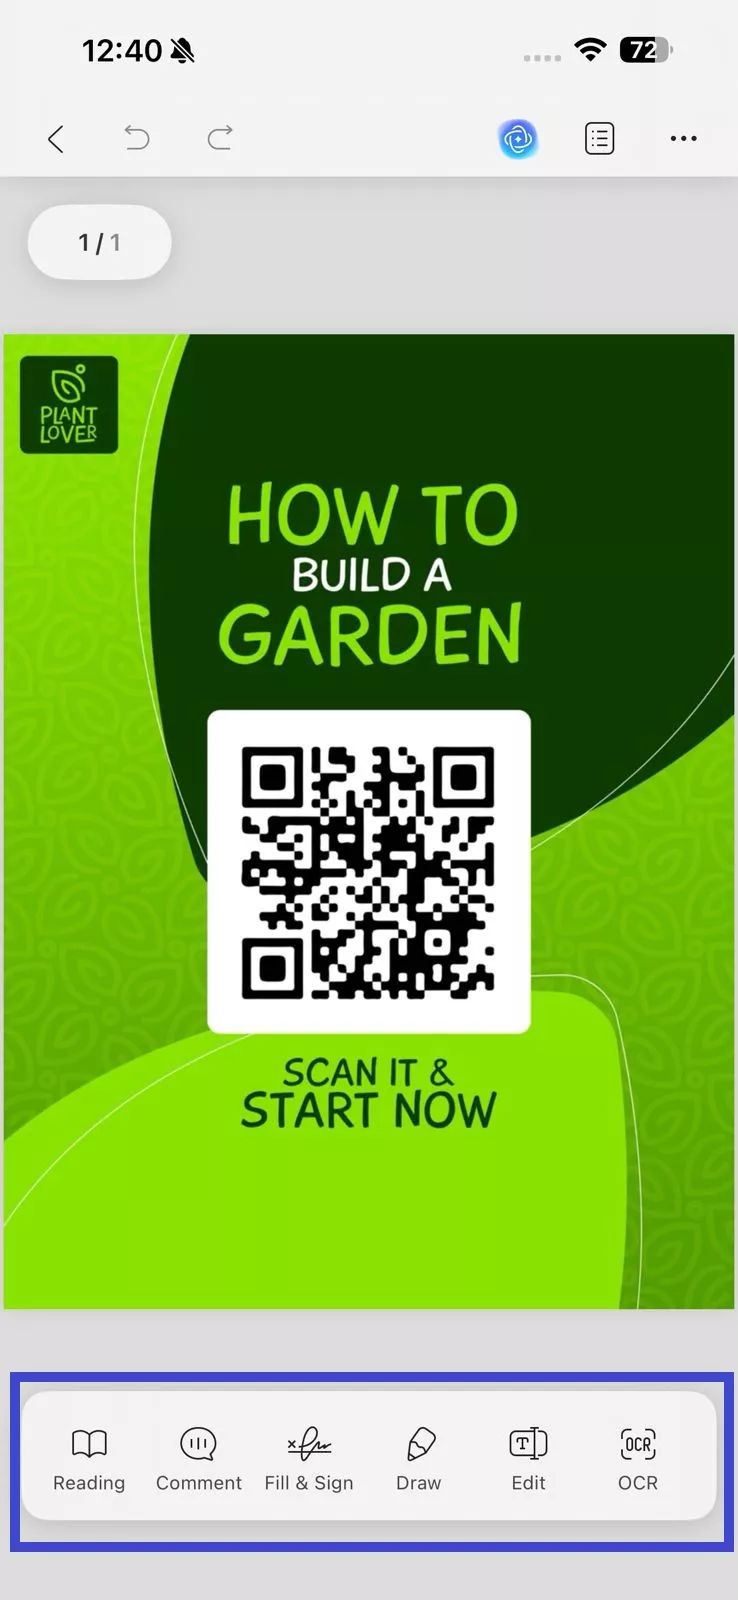
Step 2. A PDF file of the image will open. You can now use the toolbar from the bottom to annotate, edit, or OCR the PDF.
You can also access the PDF later on from the "Files" directory within the UPDF app.
2. Convert Multiple Photos to PDF
Step 1. Click the "Select" checkbox on the top right corner and select all the photos to convert.
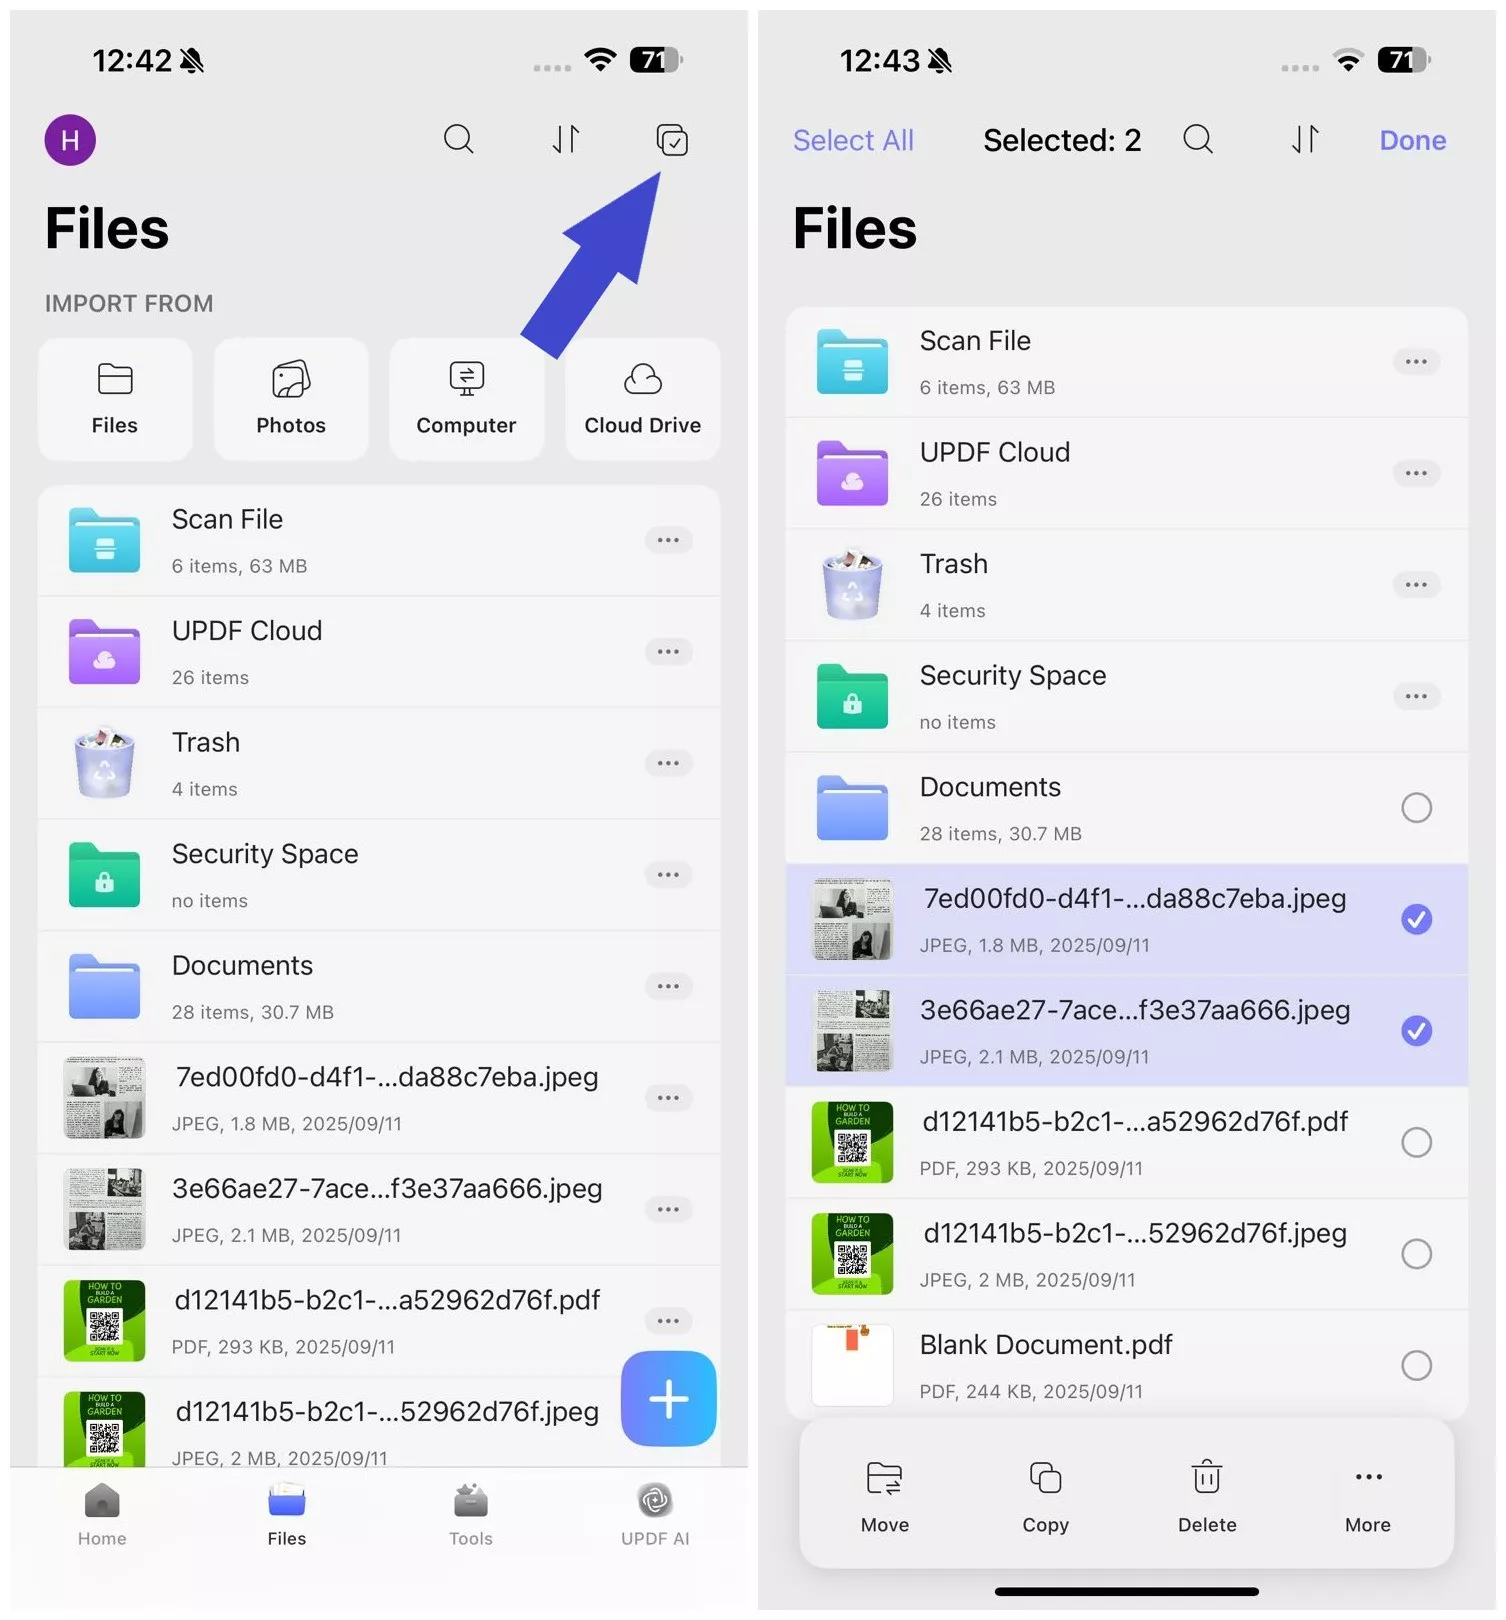
Step 2. Click the "More" button from the bottom menu and tap "Convert to PDF".
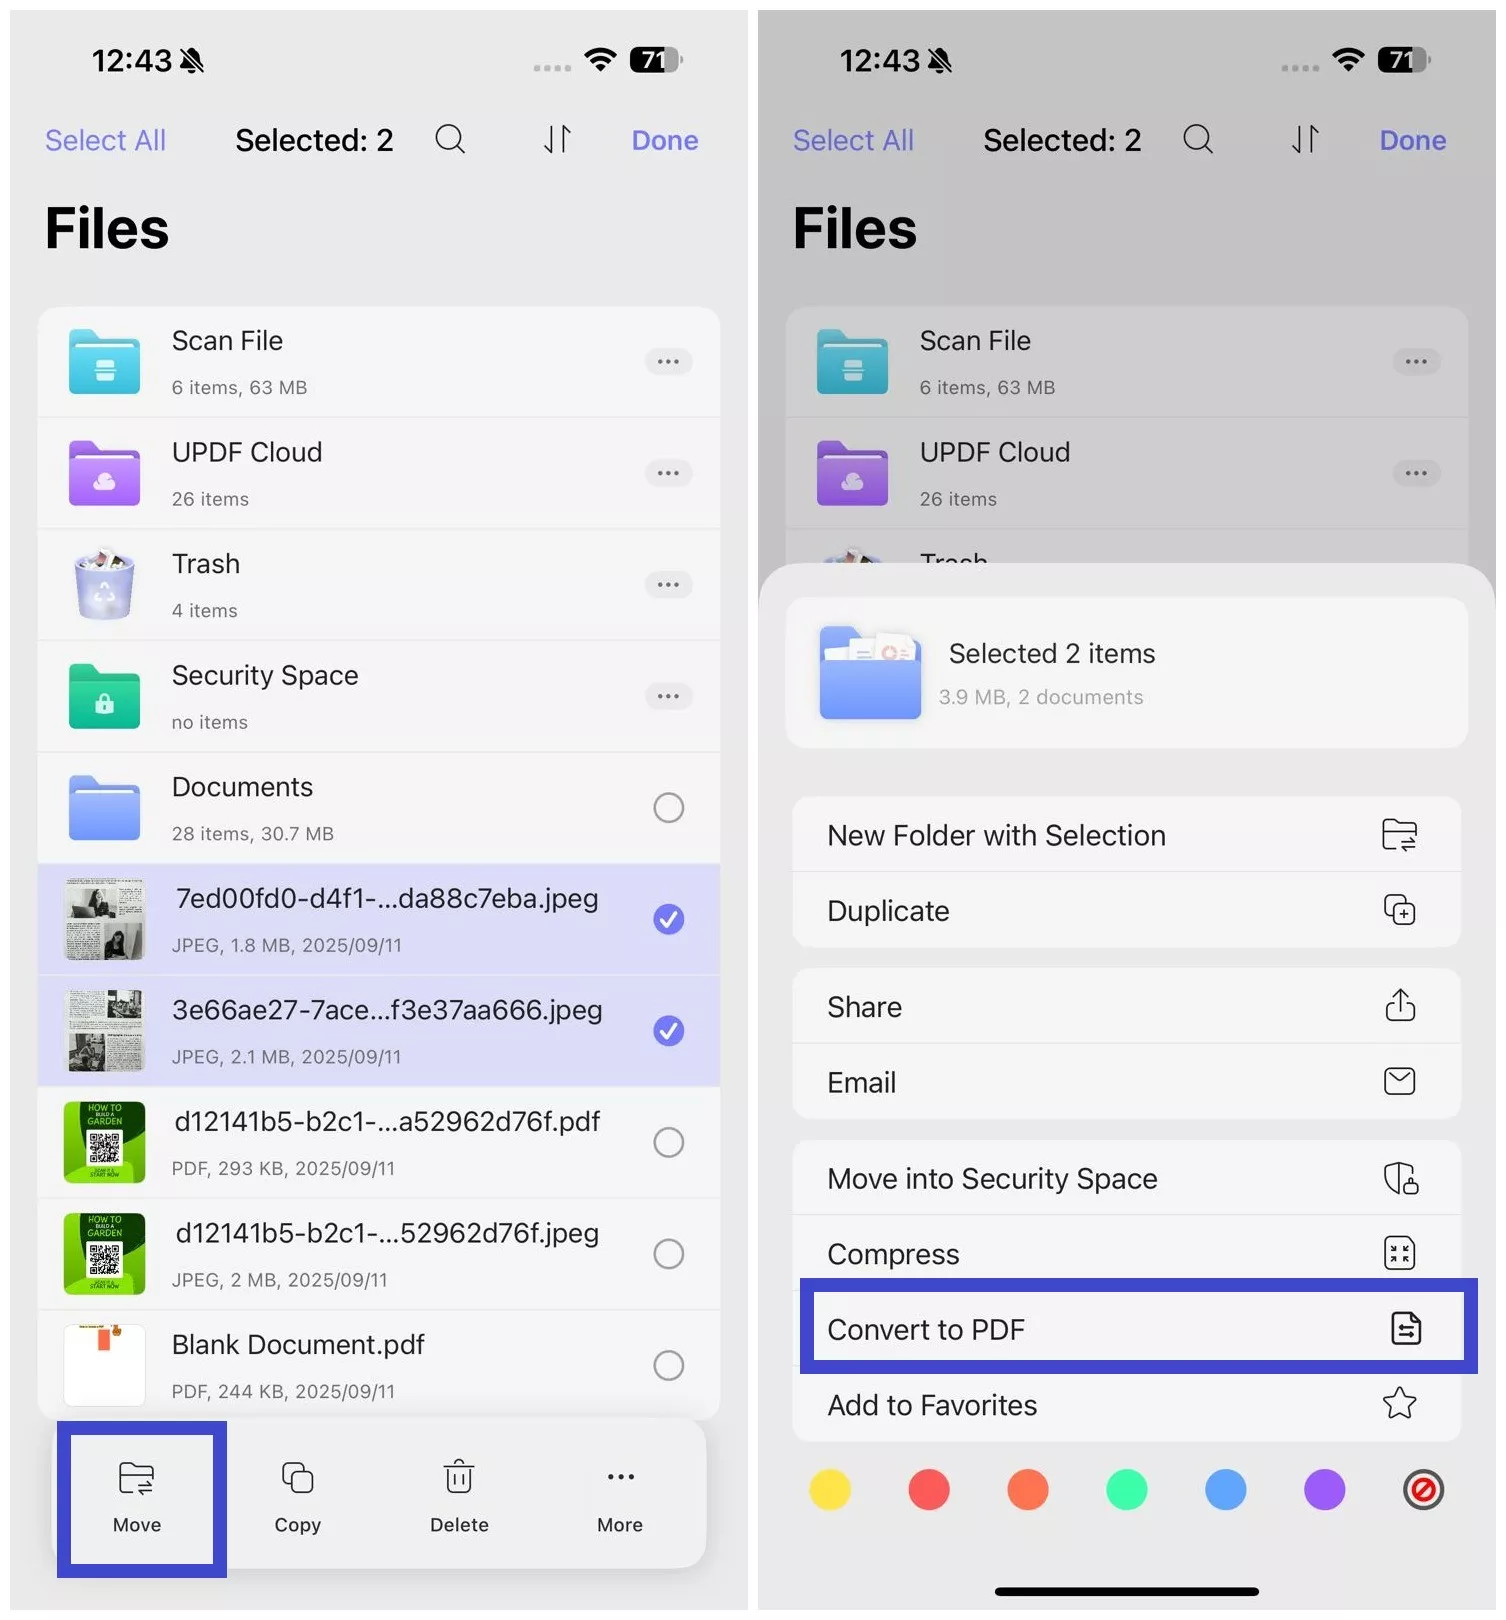
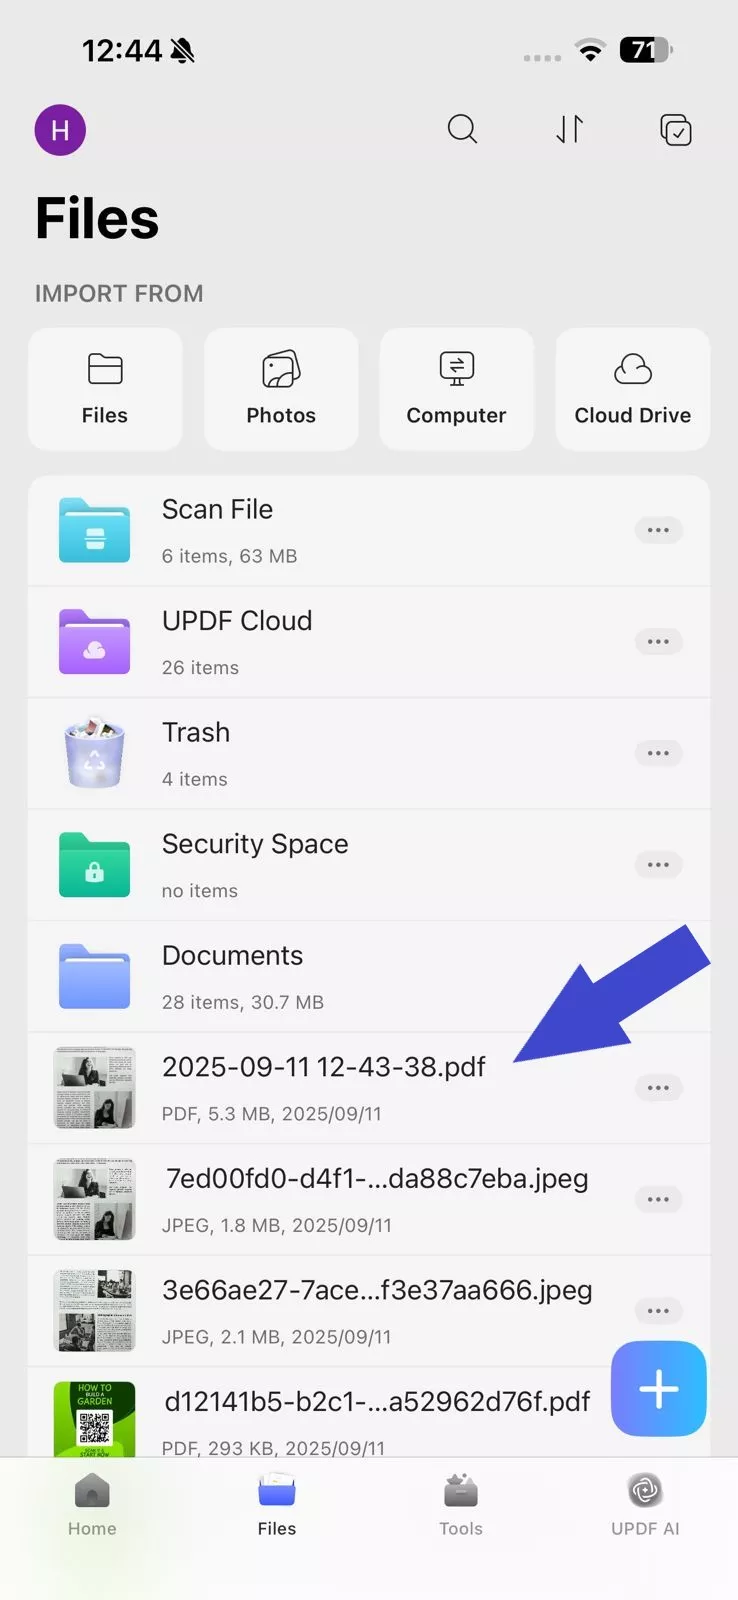
The selected images will now merge into a single PDF file, accessible from the "Files" tab.
3. Create PDF from Other Formats (Word, Excel, and PPT)
UPDF lets users create PDFs from other file formats, including Word, Excel, PPT, and images. The steps are as follows:
Step 1. First, you have to import the file into the UPDF app. Click the "+" icon and select "Files" under "Import From". Select the file you want to import and click "Add".
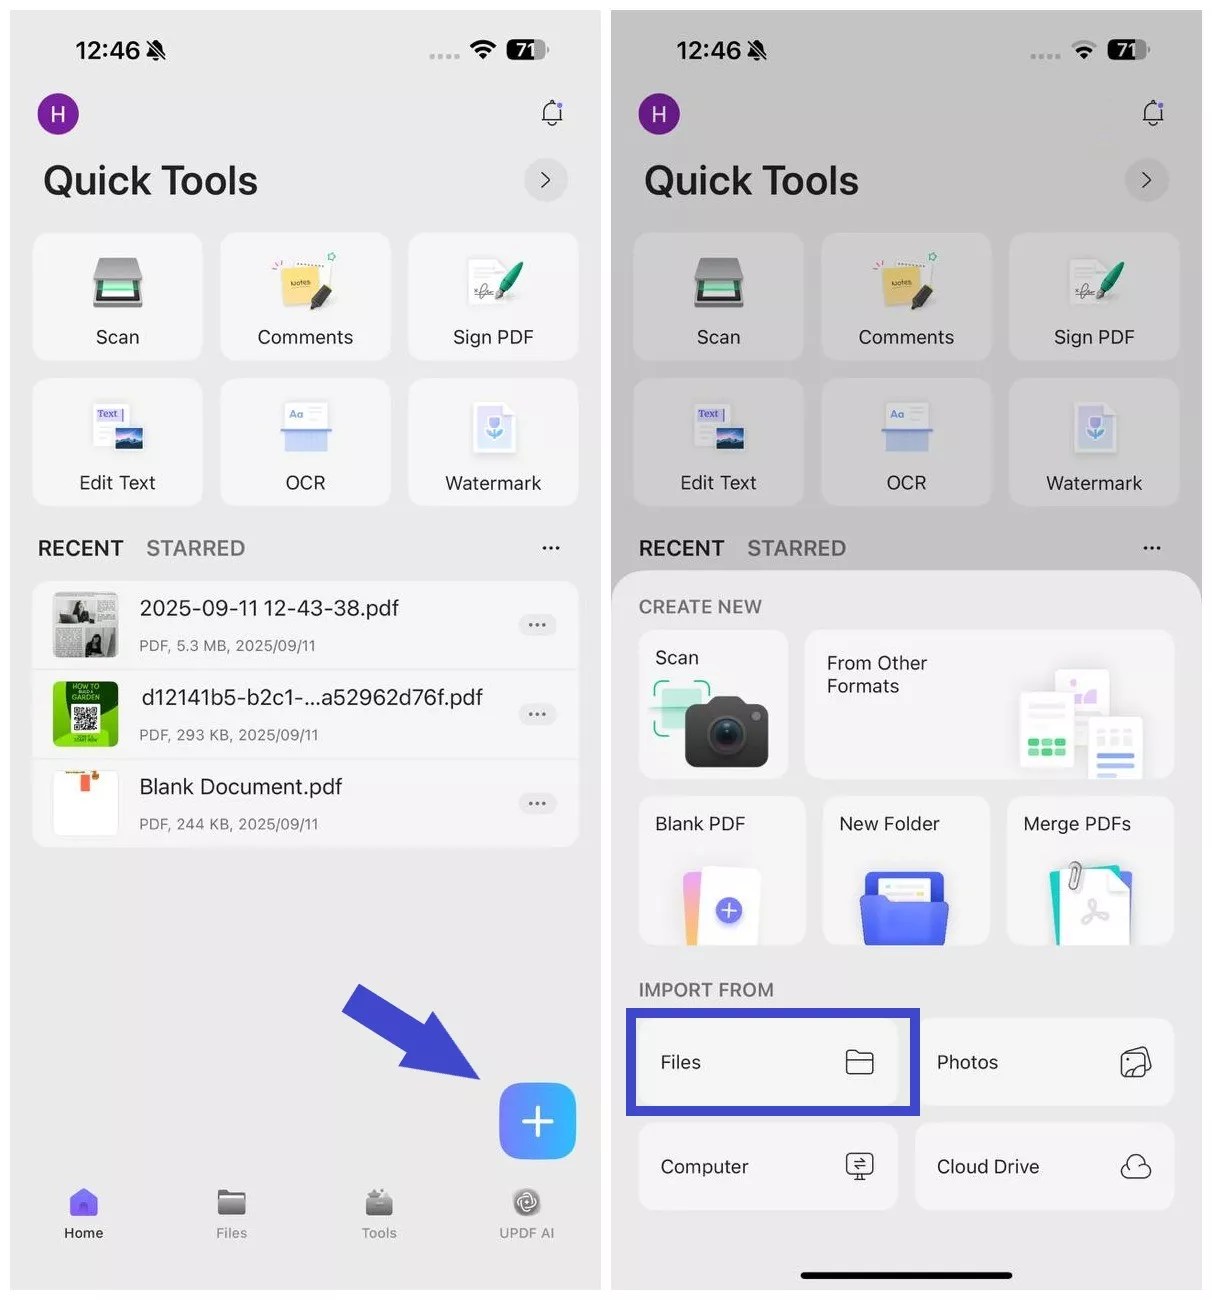
Step 2. Click the "+" icon again and select "From Other Formats".
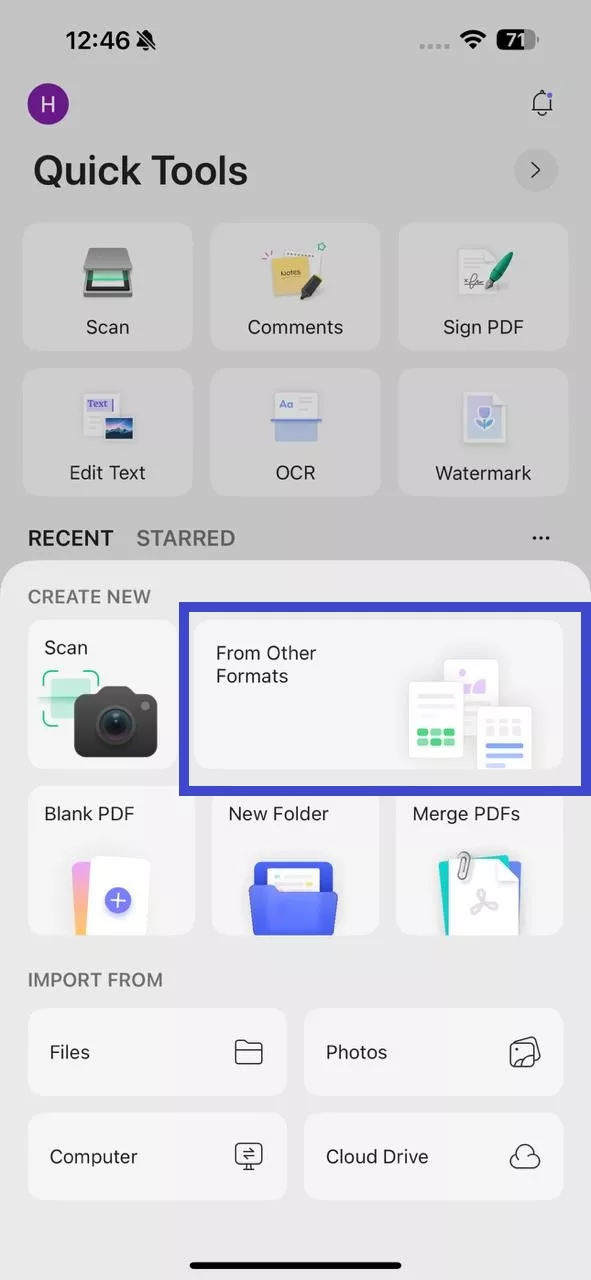
Step 3. Choose one of the 4 formats:
- Word to PDF
- Excel to PDF
- PowerPoint to PDF
- Image to PDF
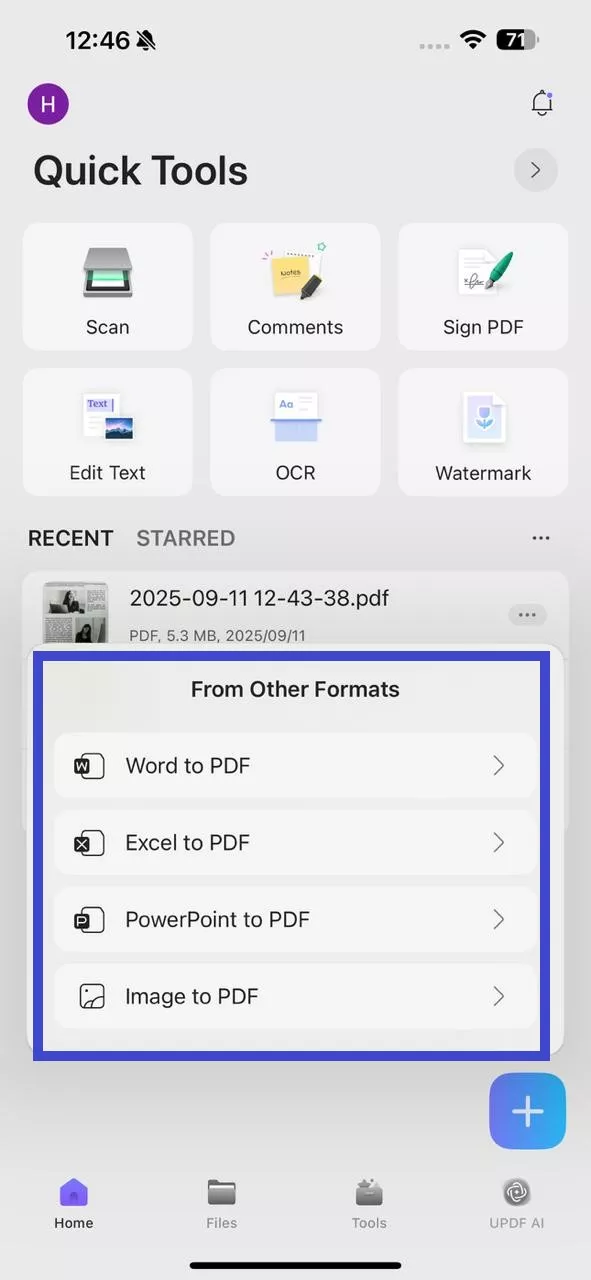
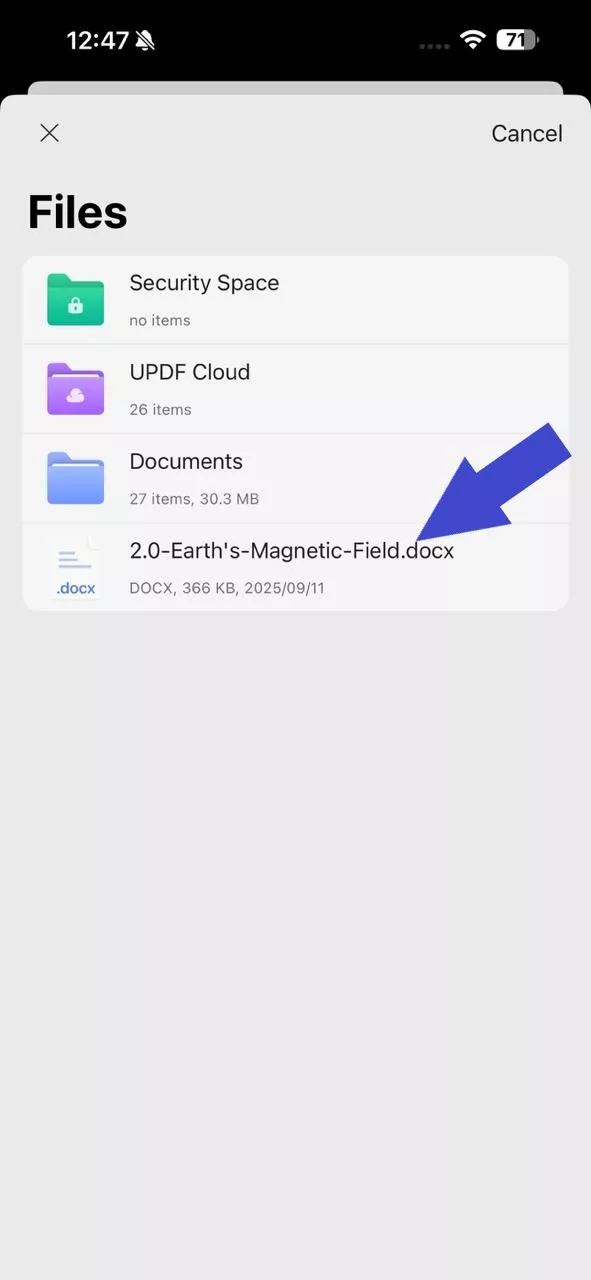
Afterward, select the file you want to convert and create a PDF.
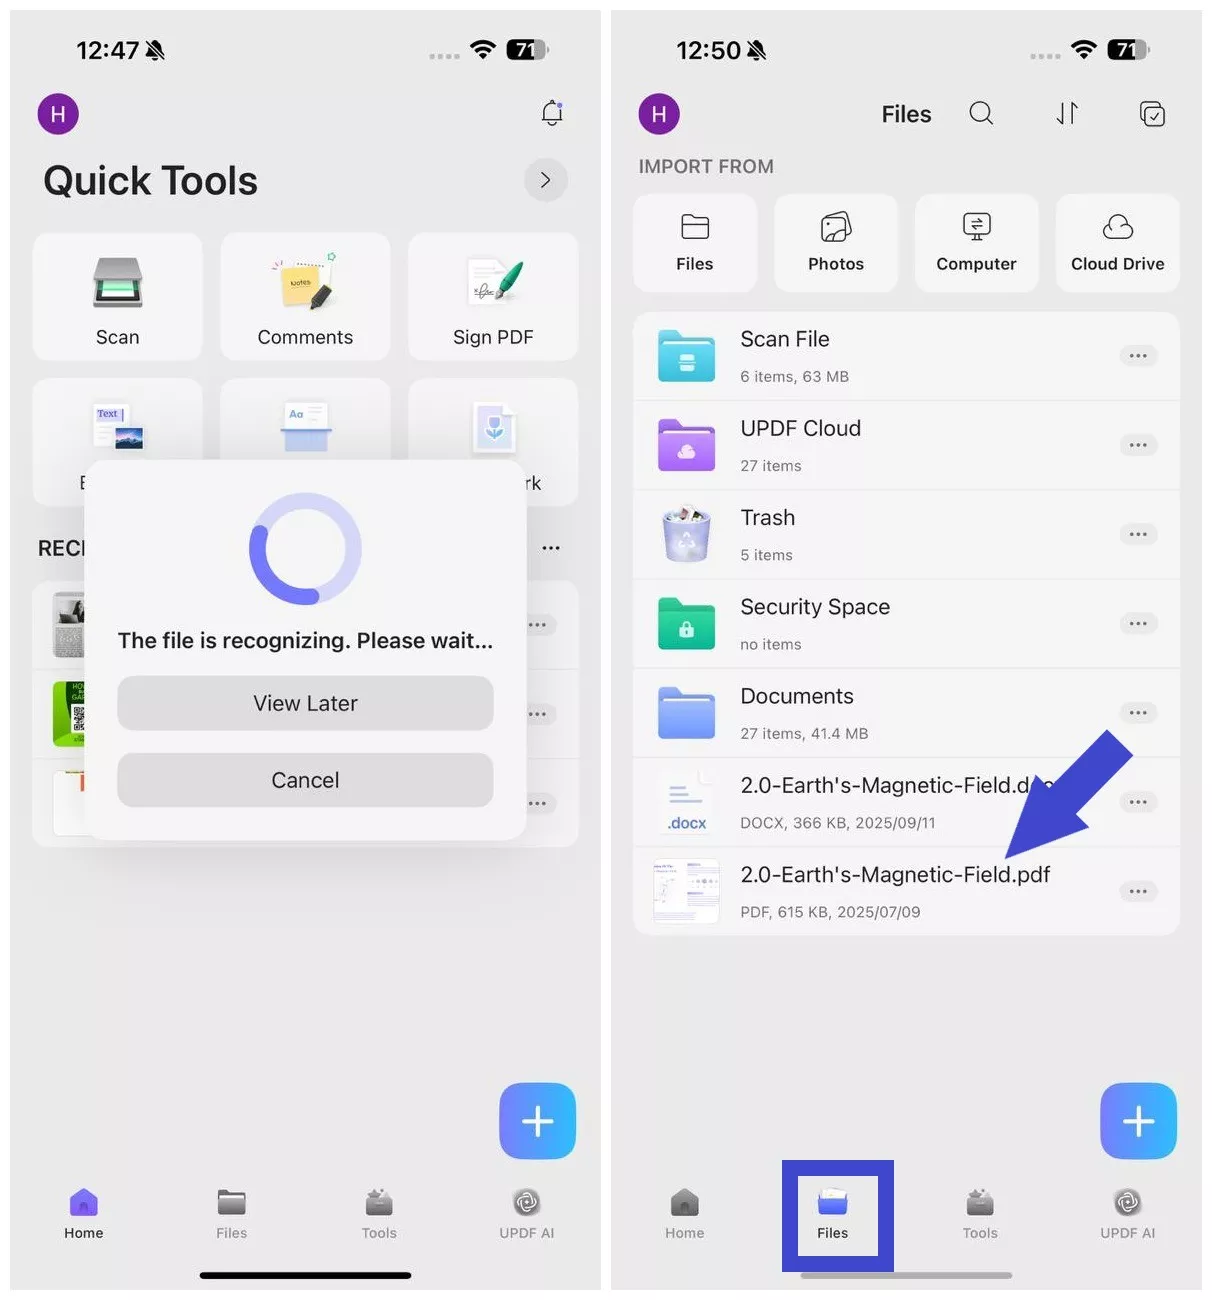
Step 4. Wait for the file recognition to complete, and then you can access the newly created PDF from the "Files" tab.
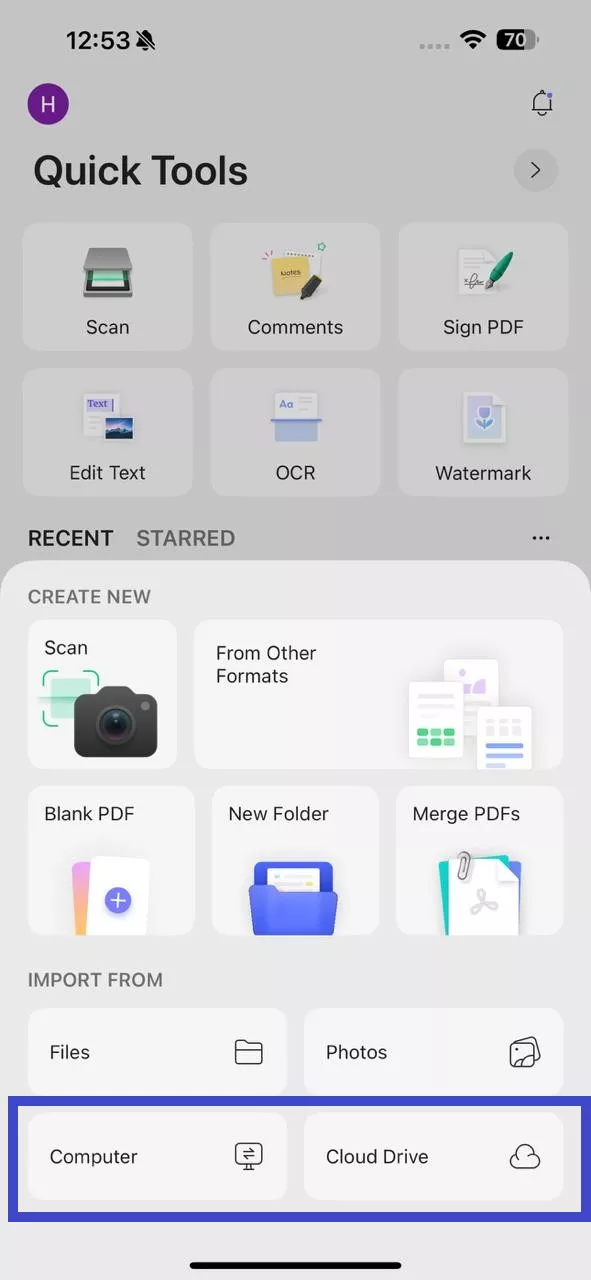
Bonus Tip 1: Import Document from Computer or Cloud Drive
Other than importing documents from your phone, you can also import them from your computer or cloud drive (Dropbox). The steps include:
Step 1. Click the "+" icon again and select either "Computer" or "Cloud Drive" under the "Import From" section.
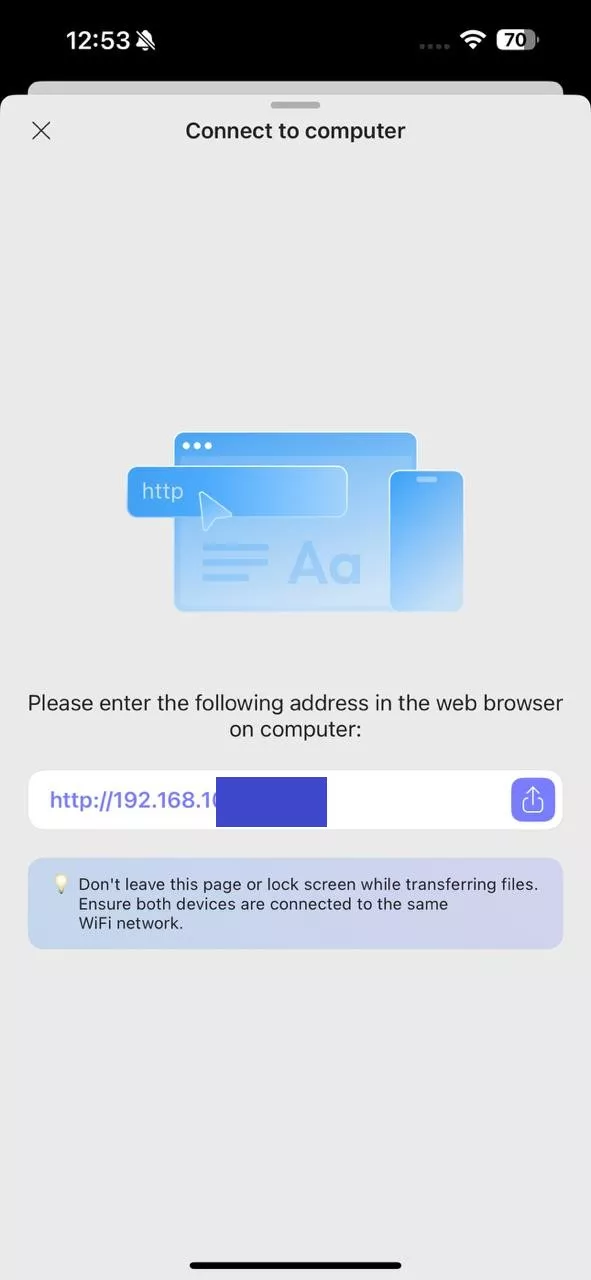
Step 2. If you choose "Computer" to import the document, enter the provided URL in your computer's browser to create a wireless connection and then transfer the files.
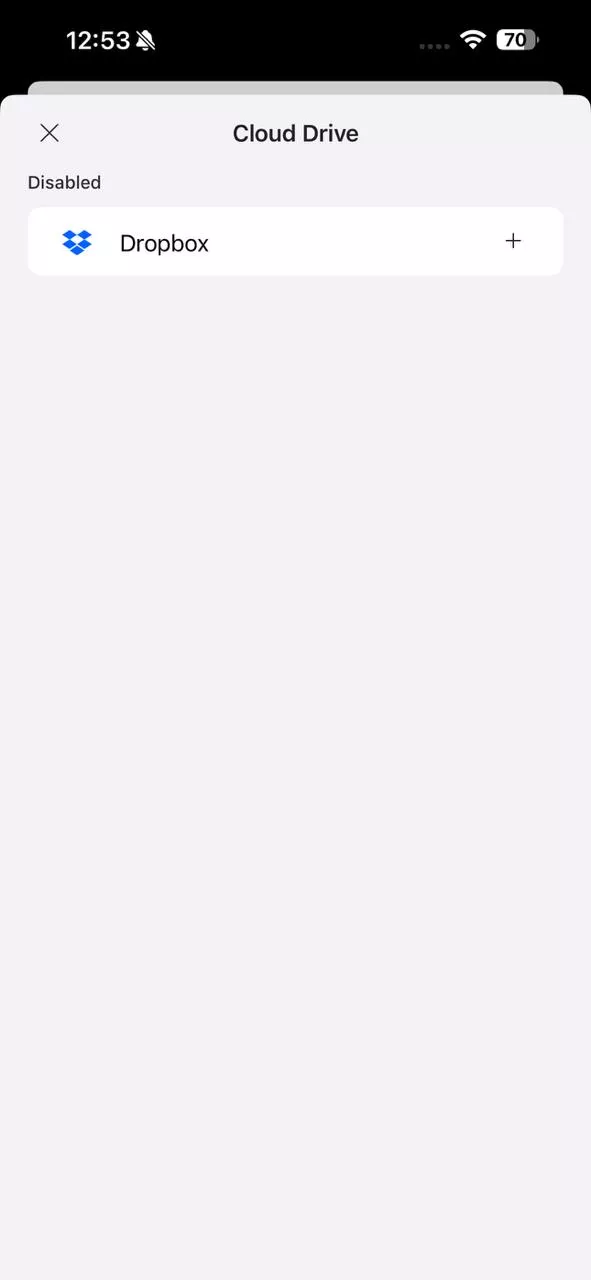
Step 2b. If you choose "Cloud Drive", then link your Dropbox account and select the files to import.
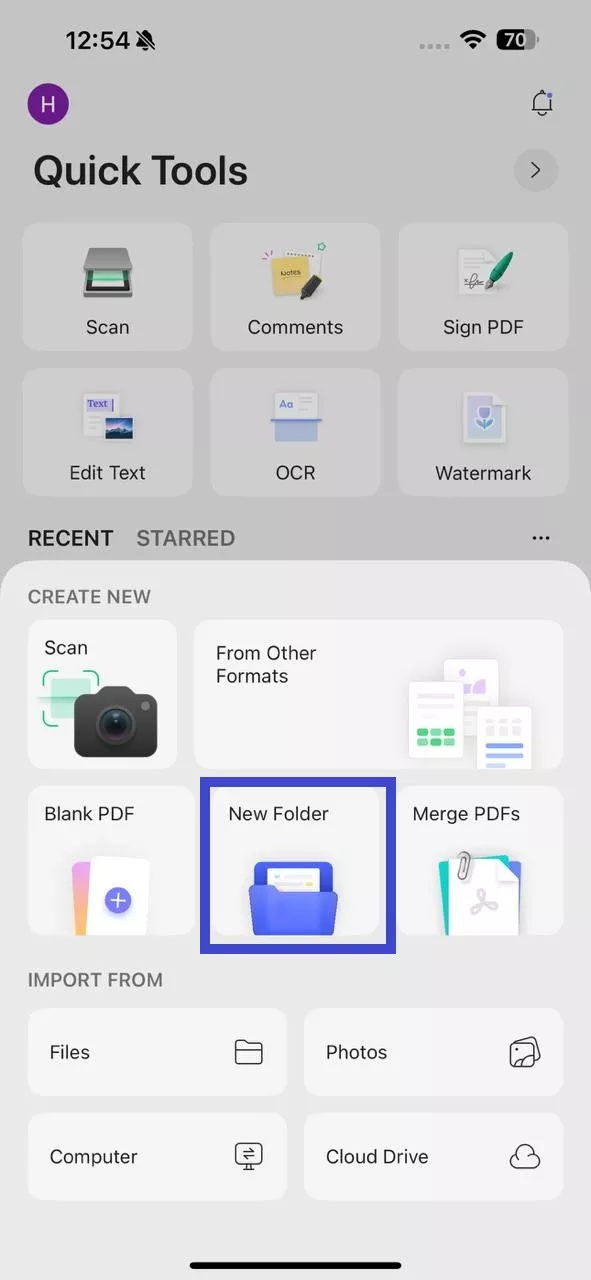
Bonus Tip 2: Organize Documents in Different Folders
Once your UPDF app has multiple files, it may start looking cluttered. To tackle that, UPDF lets you organize documents in different folders:
Step 1. Click the "+" icon again and select "New Folder". Give the folder a name.
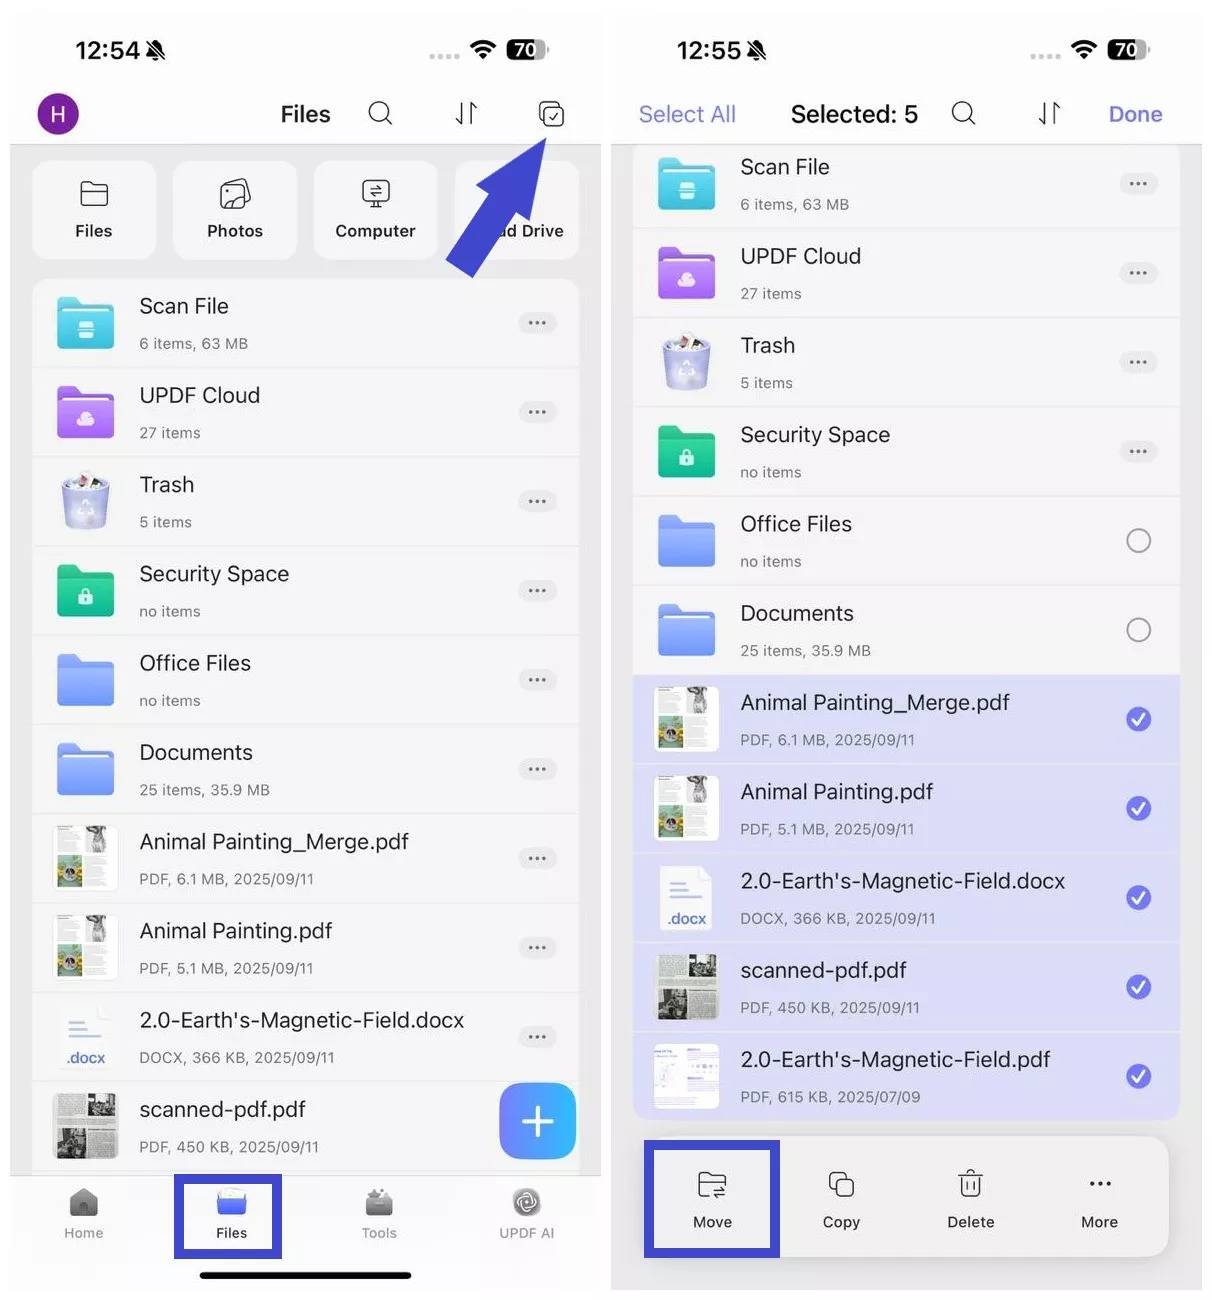
Step 2. Next, go to the "Files" tab, click the "Select" icon from the top, and select all the files you want to move to the new folder.
Step 3. Lastly, click "Move" and select the folder to migrate all these files to that folder.
Overall, UPDF offers an all-in-one app to create PDFs from various scenarios and organize them effectively. So, what are you waiting for?
Get a UPDF license from the official website and start using our powerful tool on iOS, Android, Windows, and Mac.
Windows • macOS • iOS • Android 100% secure