UPDF para Windows
 UPDF para Mac
 UPDF para iPhone/iPad
 UPDF para Android
 UPDF AI ONLINE
 UPDF Sign
 Editar PDF
 Anotar PDF
 Crear PDF
 Formulario PDF
 Editar enlaces
 Convertir PDF
 OCR
OCR PDF a Word
 PDF a imagen
 PDF a Excel
 Organizar PDF
 Combinar PDF
 Dividir PDF
 Recortar PDF
 Girar PDF
 Proteger PDF
 Firmar PDF
 Redactar PDF
 Desinfectar PDF
 Eliminar seguridad
 Leer PDF
 UPDF Cloud
 Comprimir PDF
 Imprimir PDF
 Proceso por lotes
 Sobre UPDF IA
 Soluciones de UPDF IA
 Guía de Usuario de IA
 Preguntas frecuentes sobre UPDF IA
 Resumir PDF
 Traducir PDF
 Chat con PDF
 Chat con imagen
 PDF a Mapa Mental
 Chat con IA
 Explicar PDF
 Investigación académica
 Búsqueda de documentos
 Corrector de IA
 Redactor de IA
 Ayudante de tareas con IA
 Generador de cuestionarios con IA
 Solucionador de Matemáticas IA
 PDF a Word
 PDF a Excel
 PDF a PowerPoint
 Guía del Usuario
 Trucos de UPDF
 Preguntas Frecuentes
 Reseñas de UPDF
 Centro de descargas
 Blog
Blog Sala de prensa
 Especificaciones Técnicas
 Actualizaciones
 UPDF vs. Adobe Acrobat
 UPDF vs. Foxit
 UPDF vs. PDF Expert
Batch Combine Files on Windows
If you want to merge multiple PDF documents or images into a single file, UPDF's Batch Combine feature makes it simple and efficient.
Note: UPDF also allows you to split a multi-page PDF into separate files or divide a single PDF page into multiple sections as individual pages. If you need step-by-step guidance for these tasks, click the links below:
1. Select the Batch Combine Option
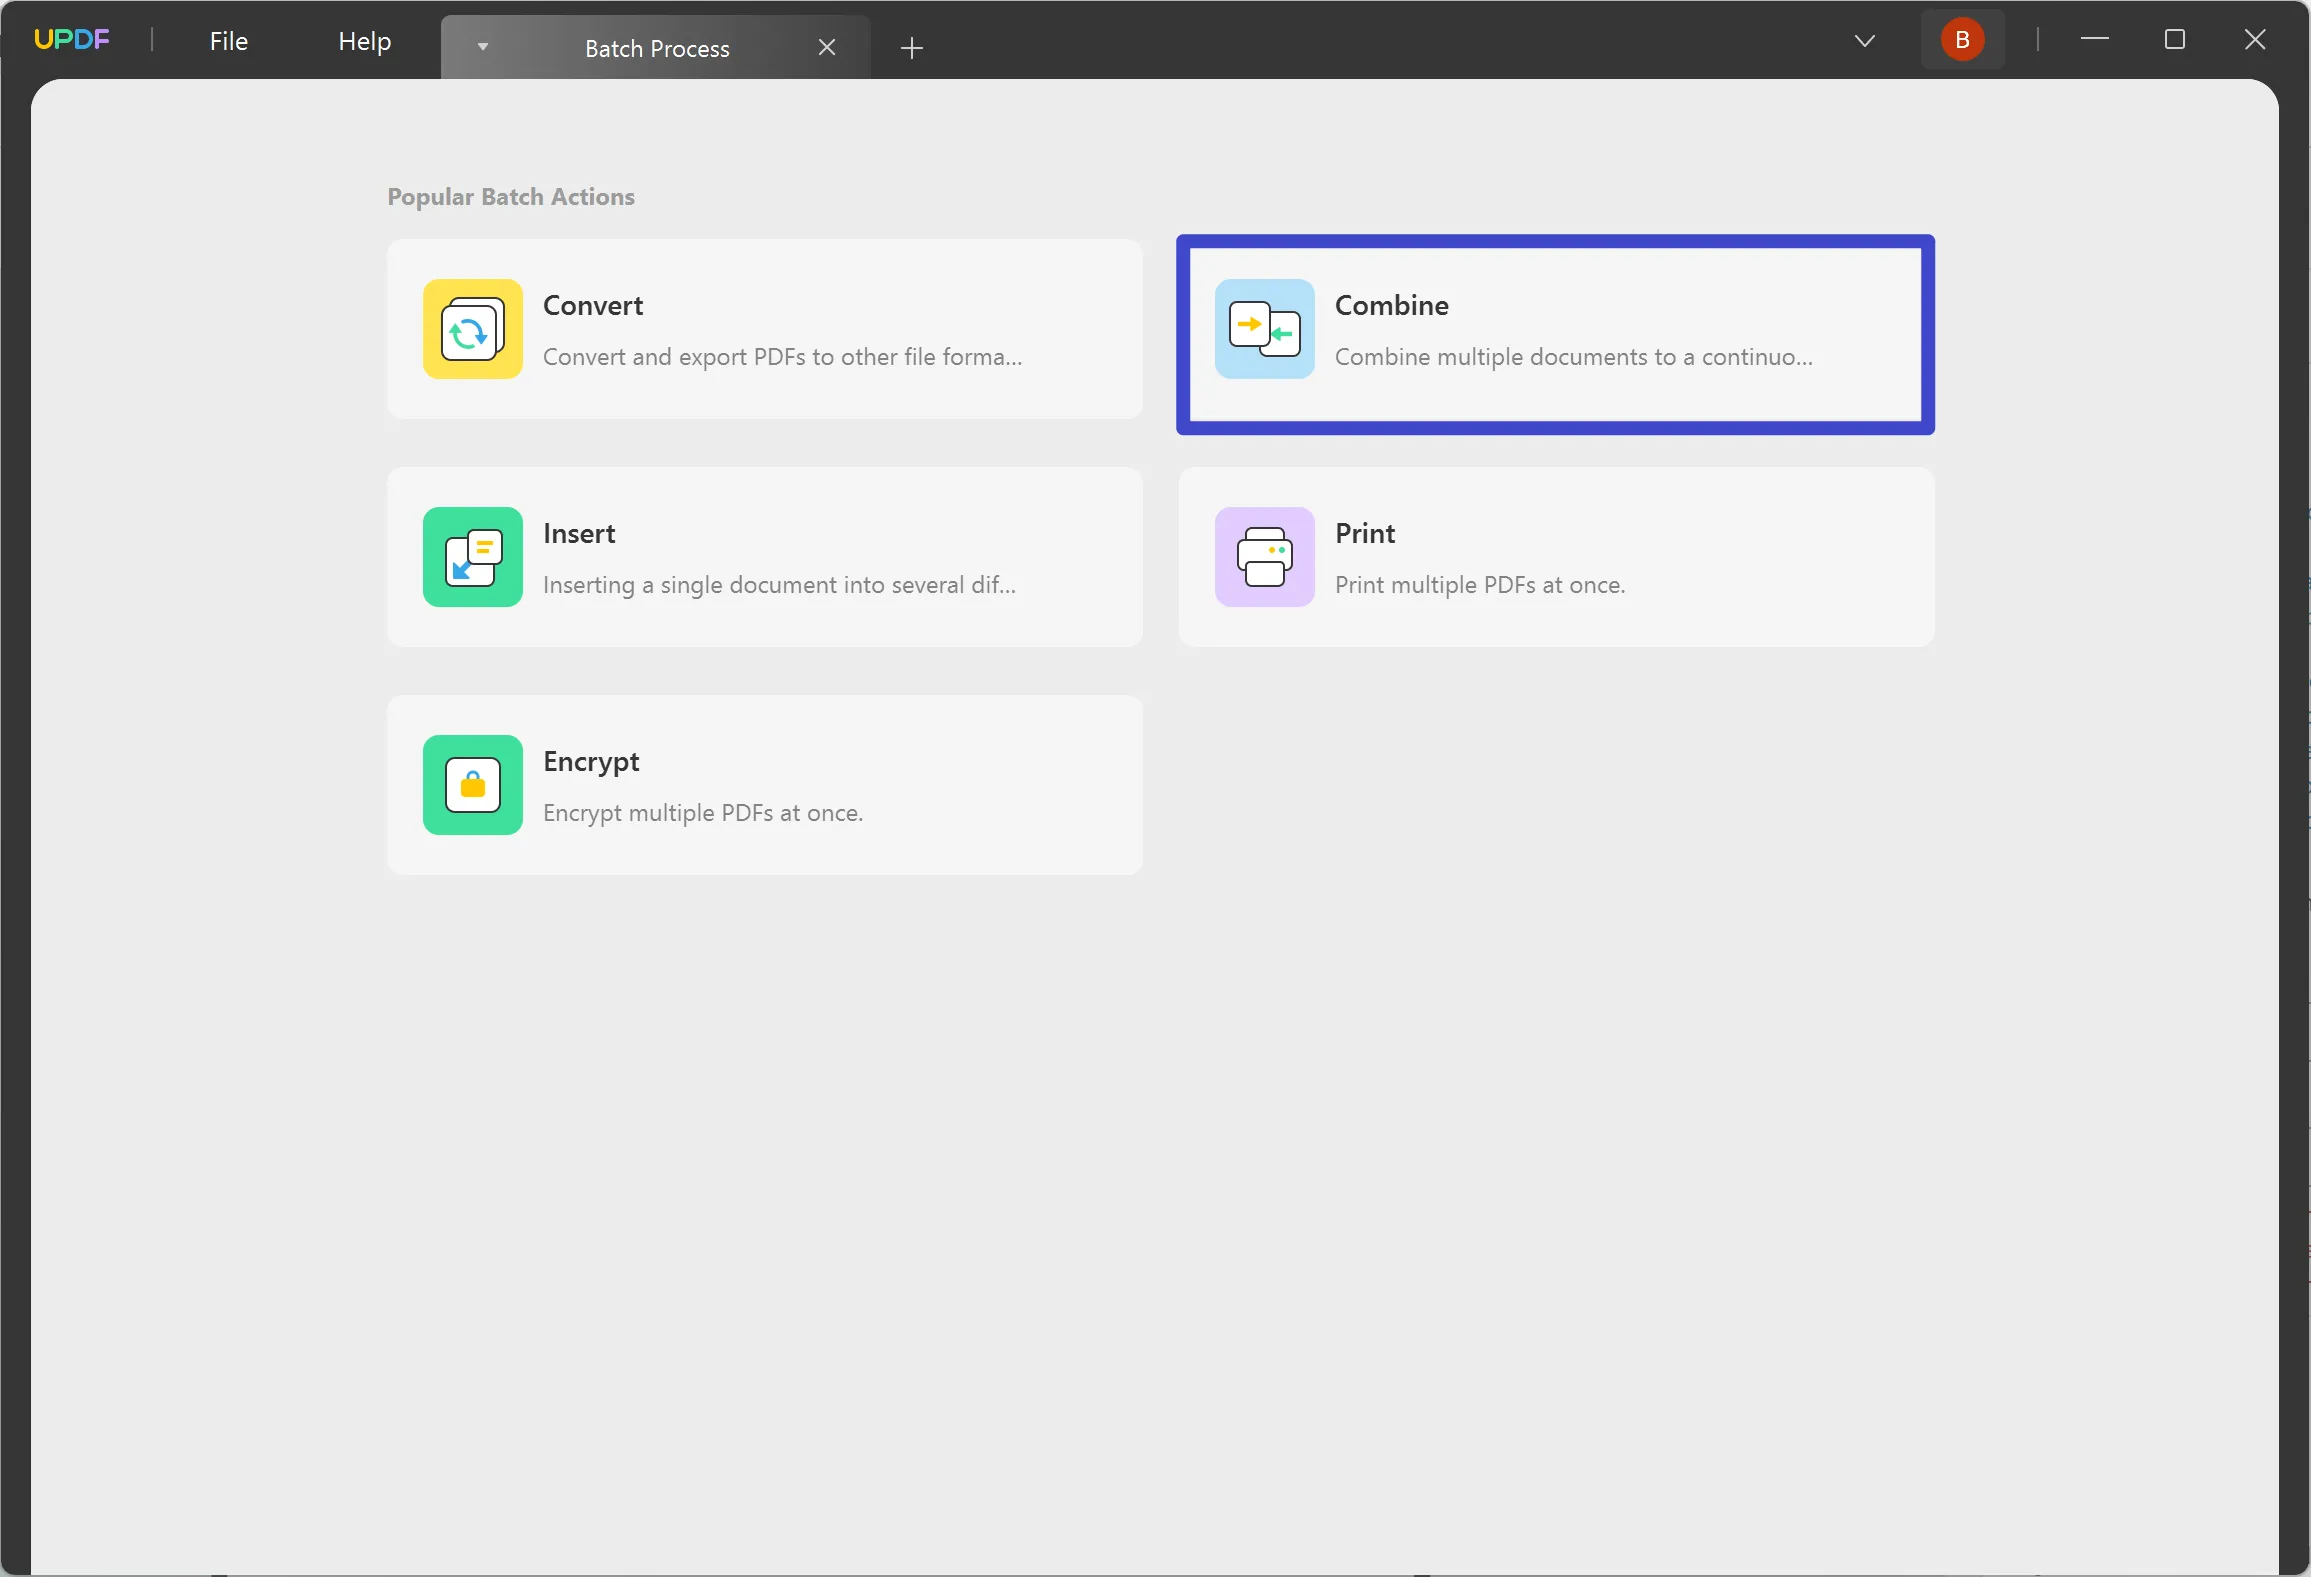
As you launch UPDF on your Windows computer, continue to the "Batch PDFs" feature on the home screen to lead to a new window.

In the new window, select the "Combine" option.
This feature provides the ability to combine PDF documents along with a variety of image formats such as JPG, JPEG, PNG, TIFF, BMP, and GIF into a single PDF.
2. Add Files
On leading to a new window, you will have to add files to combine, which can be done in a variety of ways:
- Dragging and Dropping
For starters, you can simply drag and drop your potential files into the opened window of UPDF.
- Navigate Files From Folders
As you select the "Add Files" button, you will be led to a drop-down option where you must select the "Add Files…" option. Continue to browse the file from the file explorer and add it into UPDF successfully.
- Adding Pre-Opened Files
You can also find the option of "Add Open Files…" in the drop-down that opens after selecting the "Add Files" button. This will add all files automatically into the section that is currently open on UPDF.
- Add Complete Folders
For adding a collection of PDF documents, you can add a complete folder with the help of the "Add Folders…" option in the drop-down menu.

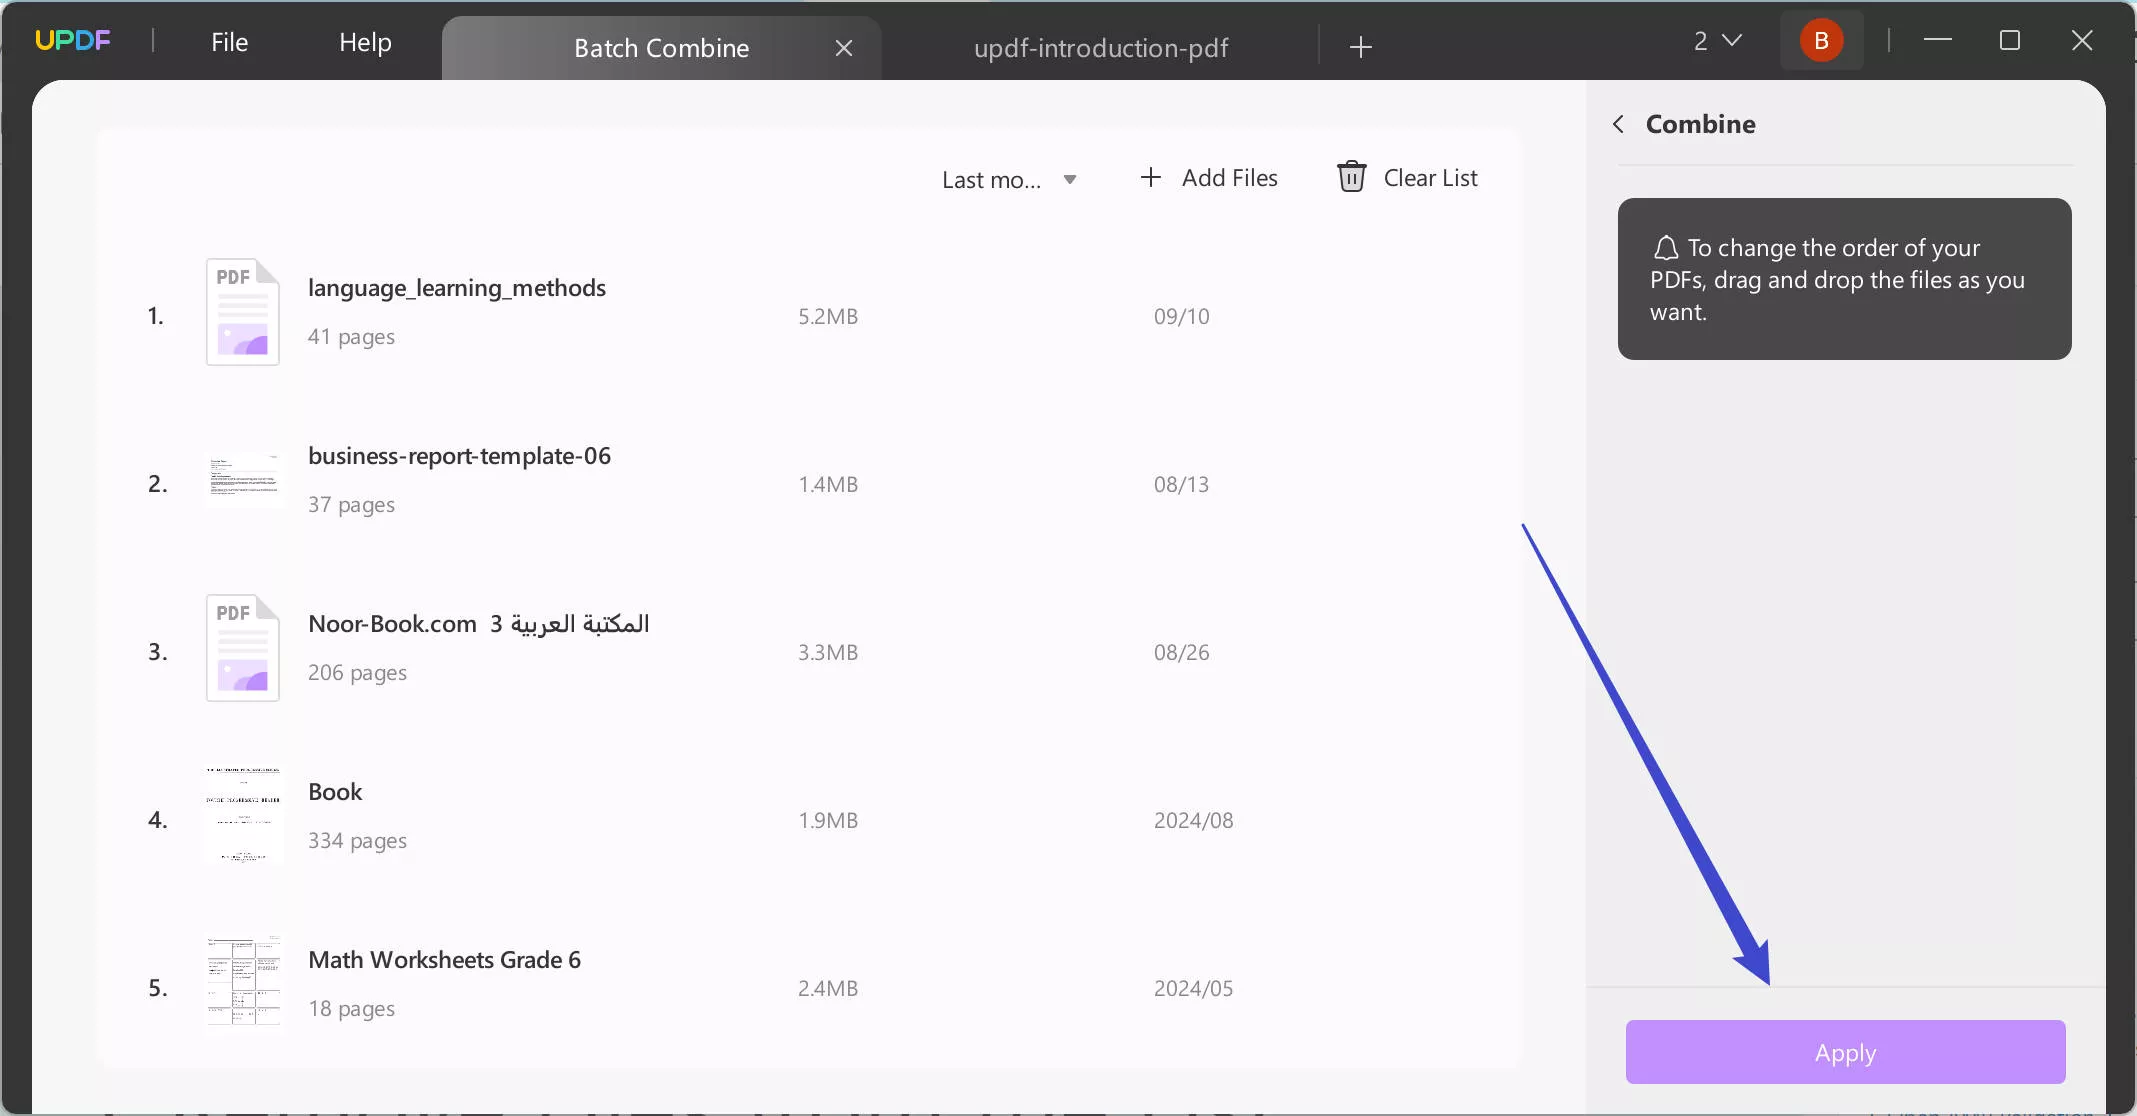
3. Rearranging Added Documents
After adding documents to the Batch Combine panel, you can easily rearrange them by dragging them into the desired order.
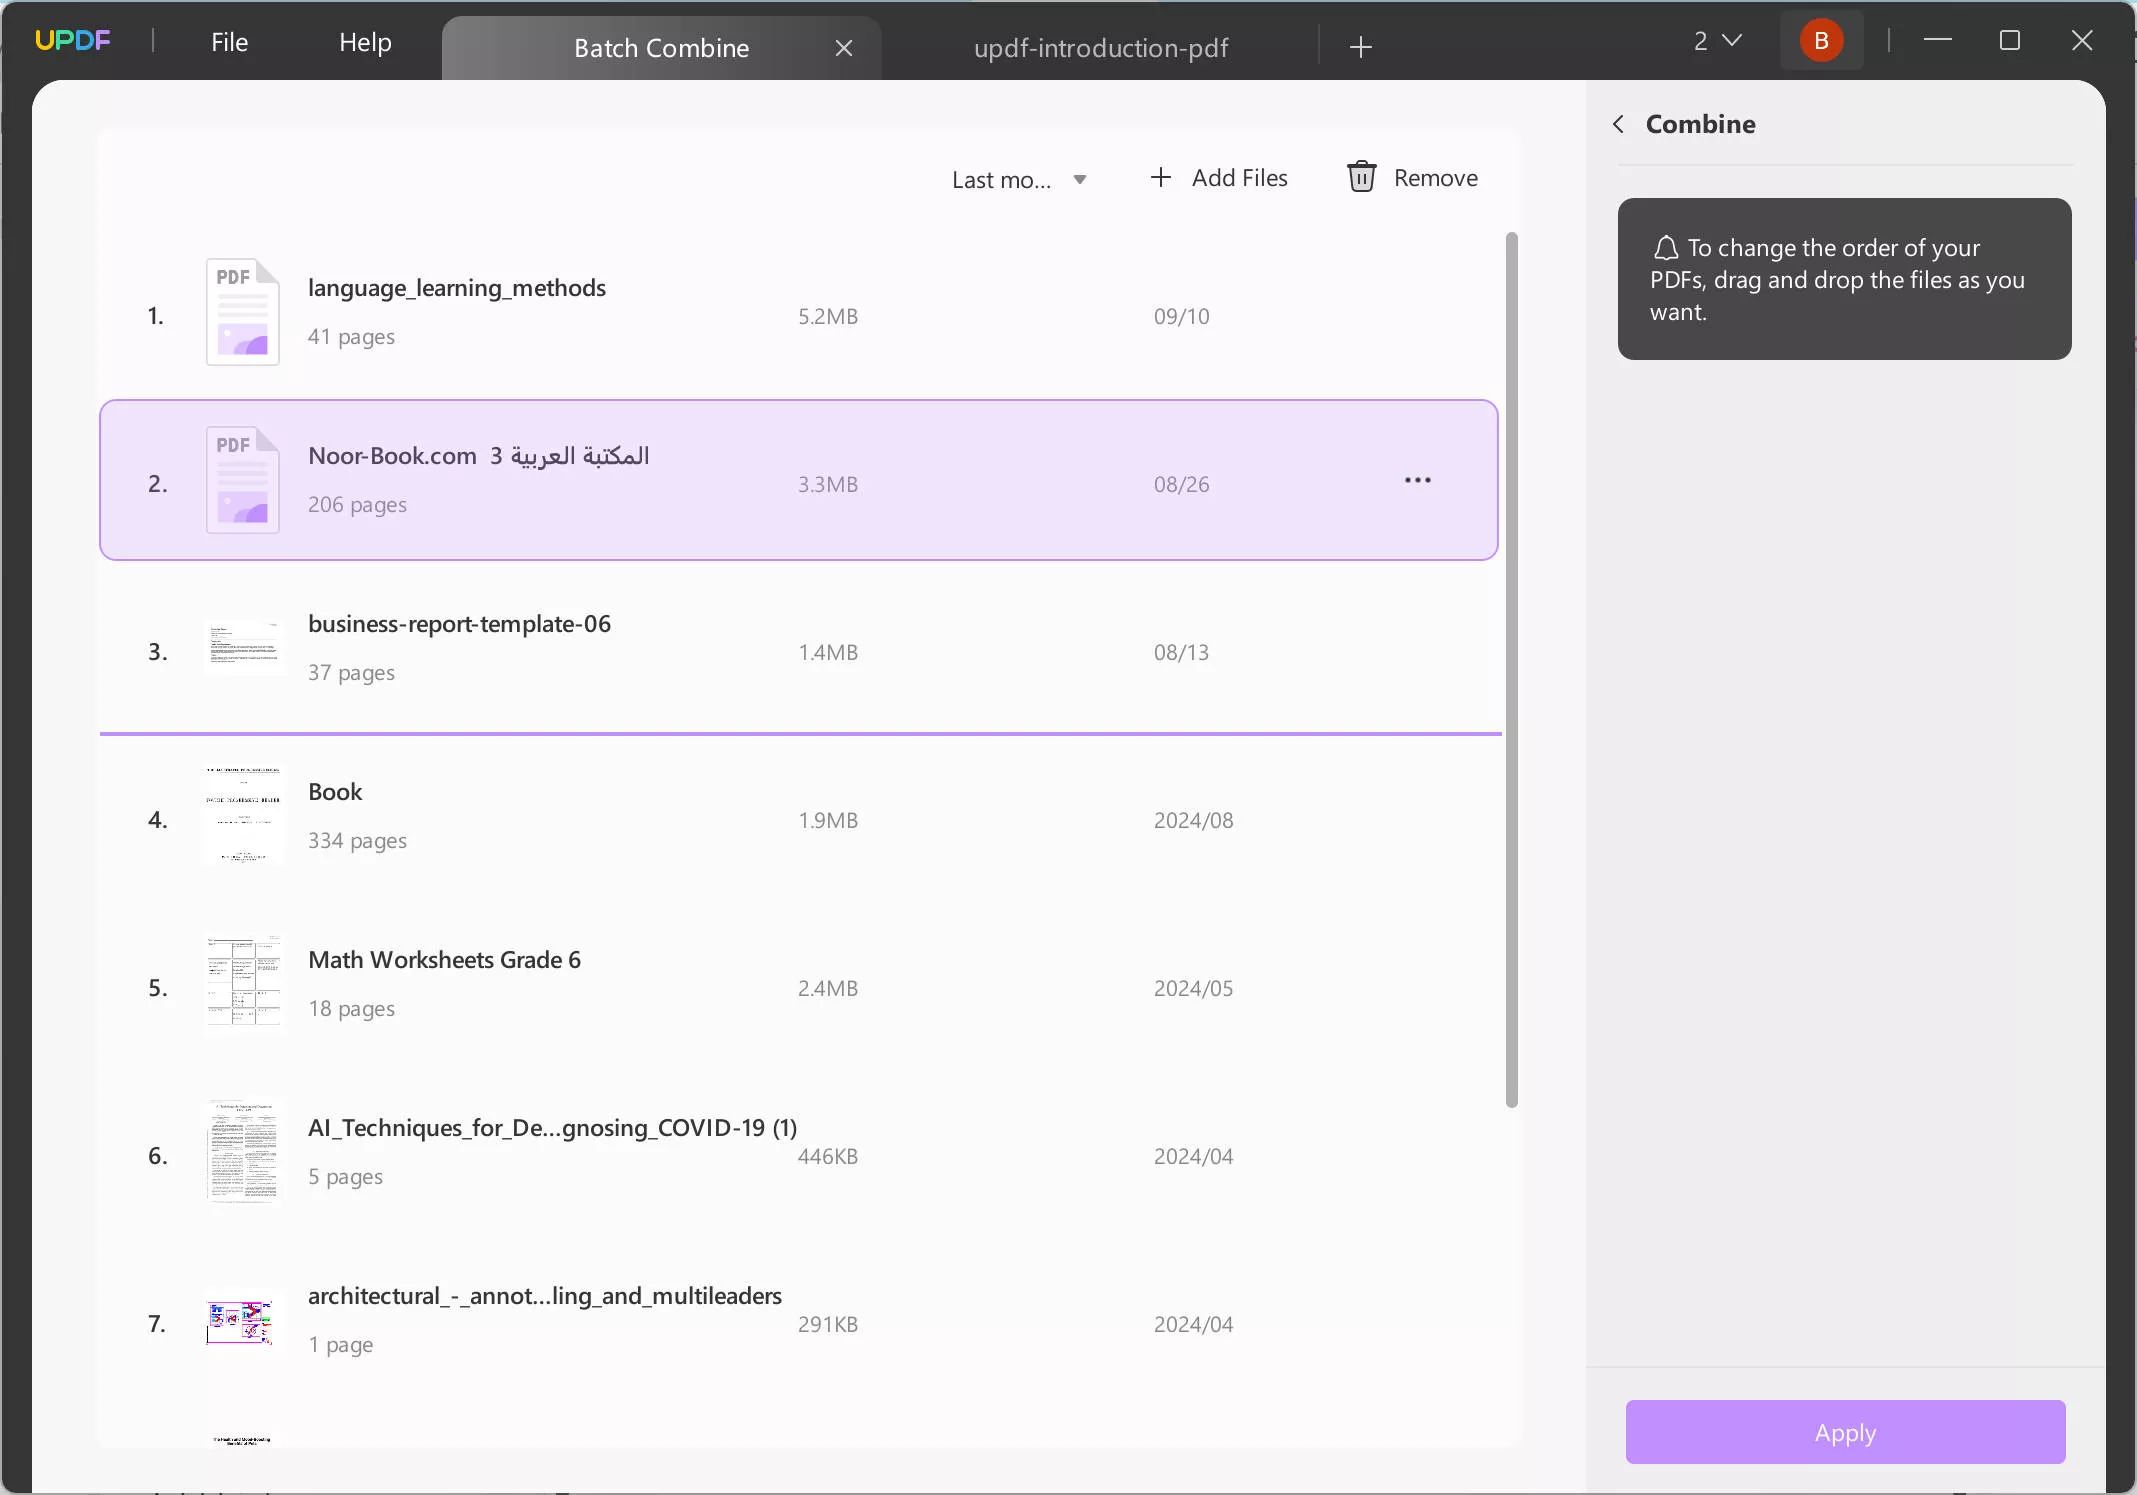
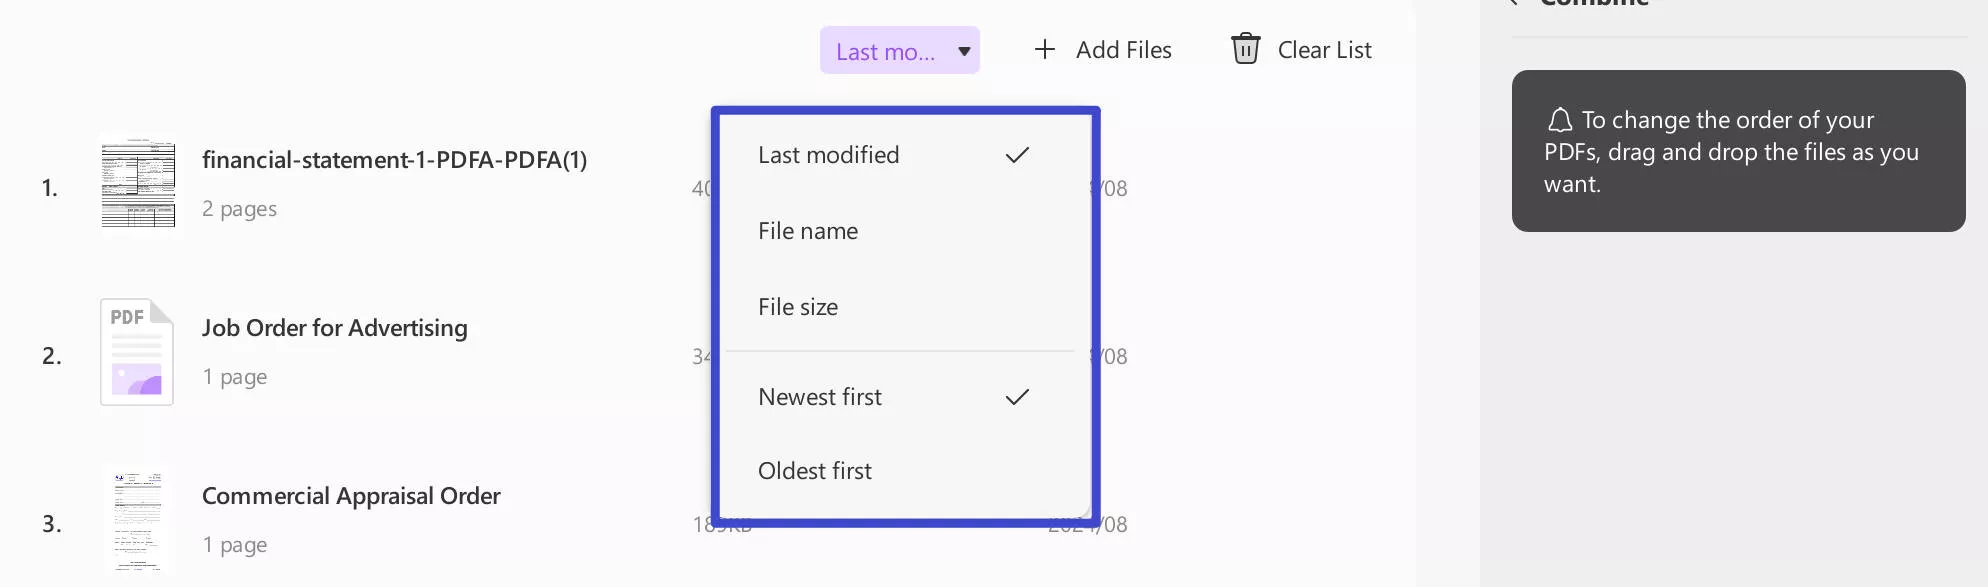
Additionally, UPDF allows you to sort the added files by last modified time, file name, file size, newest first, or oldest first.
4. Combine Files
As you are done with adding all the files and rearranging them, continue to the "Apply" button to save the new document in any particular position you want to.
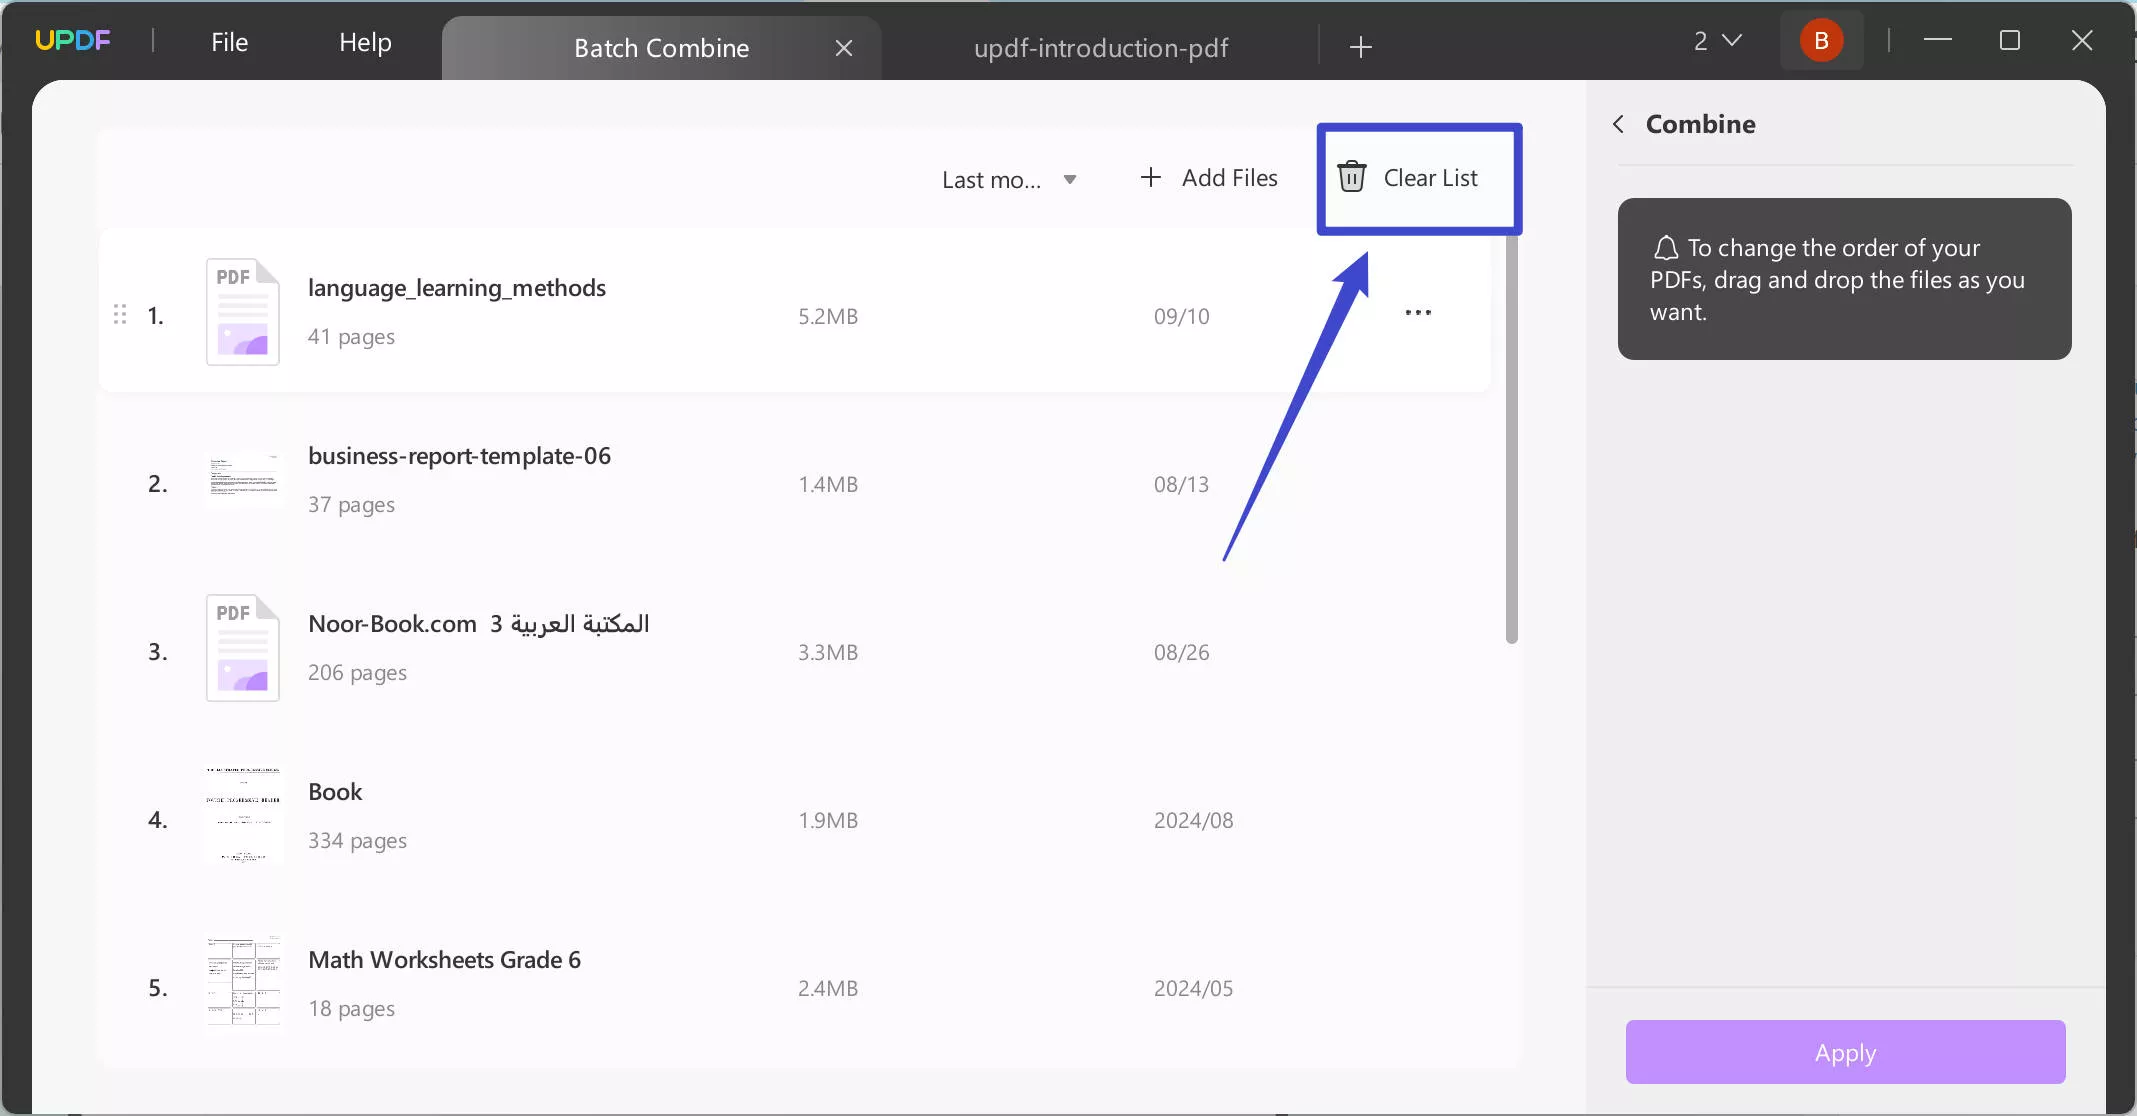
5. Remove Files from the List
If you intend to remove a specific file, find the "three-dots" icon adjacent to the added document and select the option of "Remove File."
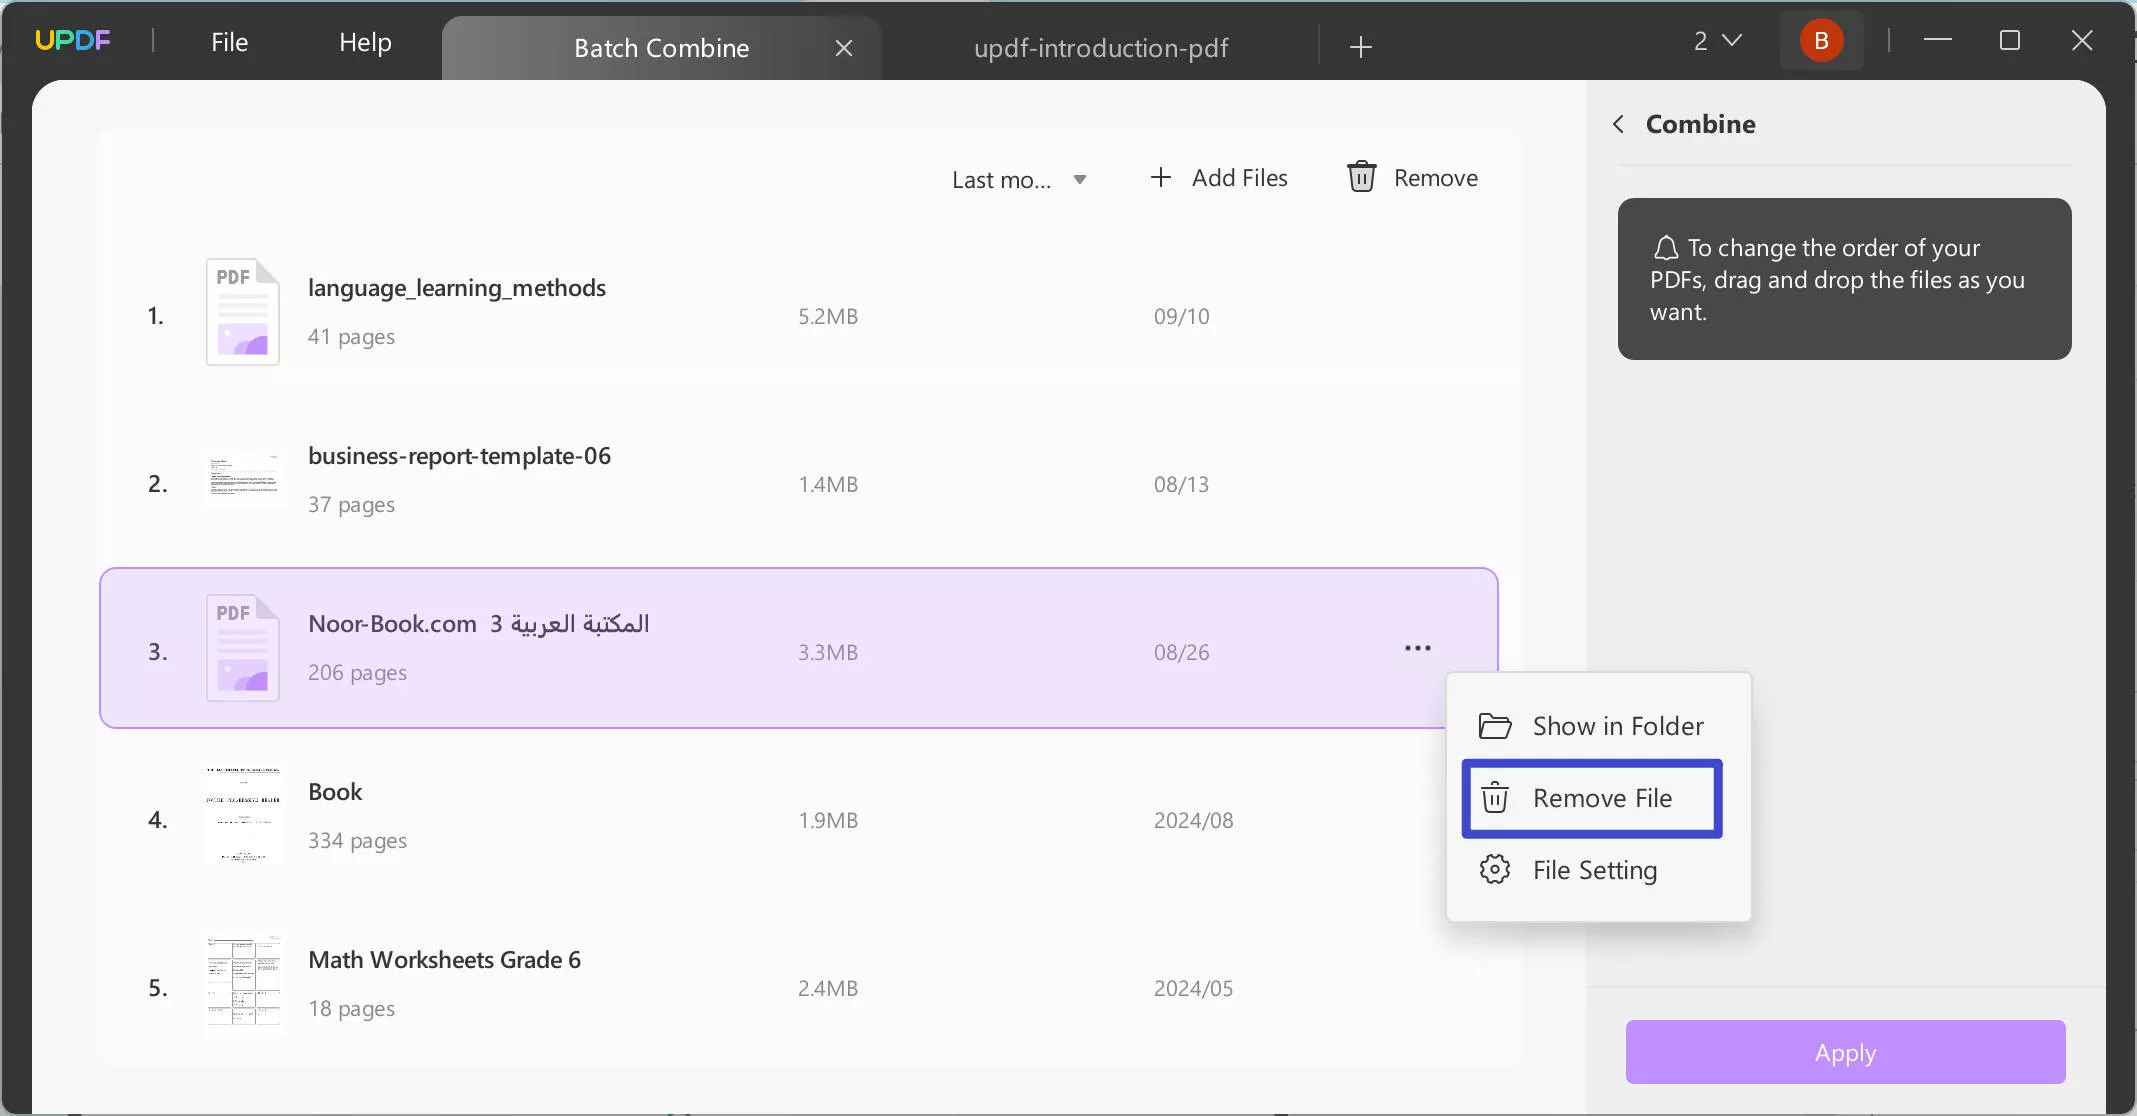
Under the same drop-down, you can also select the option of "Show in Folder" to access the location of the document. To view its properties, use the option of "File Setting."
If you intend to clear the complete list of added documents, use the "Clear List" button.